 |
Removing Dust Marks From Film and Slides
Using the Dust Removal feature in EPSON Scan, you can virtually “clean” the dust marks from film or slides as you scan them.
|
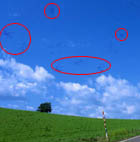
Original image
|
Dust Removal applied
|
|
|

|
 |
Note: |
|
|
Before scanning your film or slides, carefully remove any dust that you can see on them.
|
|
Follow these steps to remove dust marks from film or slides using EPSON Scan:
 |
Start EPSON Scan. See one of these sections for instructions:
|
 |
When the EPSON Scan window appears, do one of the following, depending on the currently selected scan mode:
|
|
-
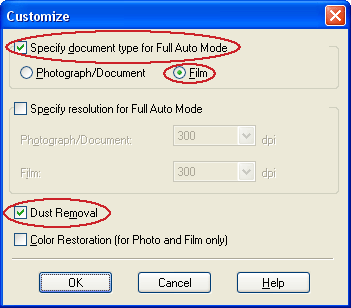
Full Auto Mode: click the Customize button, then click the Specify document type for Full Auto Mode checkbox and select Film, if necessary. Then click the Dust Removal checkbox and click OK. Continue with step 9.
|
| |
Note: |
 |
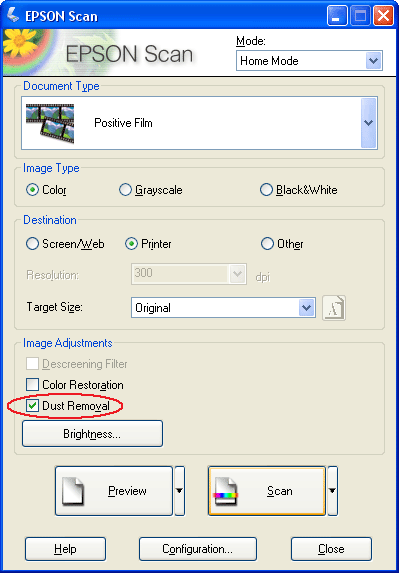
Select the basic settings for your film strip or slide(s), then select the destination setting for the way you will use your images. See Selecting Basic Settings for instructions.
|
 |
Do one of the following:
|
| |
Note: |
 |
Click the Scan button to scan and remove dust marks in your image.
|
| |


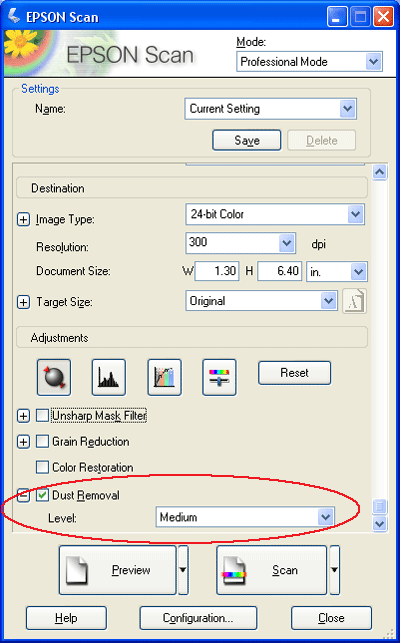
 (Macintosh) button next to the option and select a setting in the Level list.

