 JPEG detail settings dialog box
 TIFF and Multi -TIFF detail settings dialog box
Scanner Software Functions / EPSON Scan to File
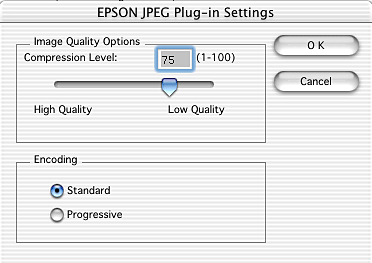
JPEG detail settings dialog box
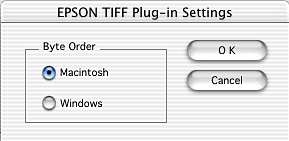
TIFF and Multi -TIFF detail settings dialog box
EPSON Scan to File is an application that launches EPSON TWAIN and saves scanned images to files automatically. It can enhance the scanning process in an efficient way. The application automatically creates sequential filenames and saves them in sequence so that bulk scanning (scanning a single image with several different settings) can be done easily.

| Note: |
|
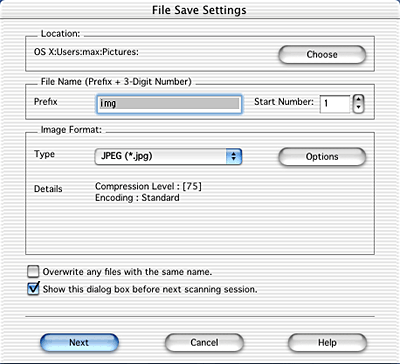
Displays the folder for saving scanned images. When this function is activated the first time, the Pictures folder in the Home directory is pre-selected. If you want to change the folder, click the Choose button, and then select or create a folder on the displayed screen.
Specify an alphanumeric character string plus a 3-digit number (start number) to use to generate filenames for storing images. The default setting generates files such as Img001, Img002, and Img003.
Enter an alphanumeric character string. The default is "img".
Enter a number from 1 to 999. It uses a 3-digit format such as 00x for one digit, or 0xx for 2 digits. When EPSON Scan to File stores images in files, it first checks the number used last time and then increments it by one to name the new file.
| Note: |
|
|
Select a file format for saving scanned images: PICT, JPEG, TIFF, or Multi -TIFF. The detailed information of each format (except the PICT format) is displayed in the Details section. Depending on the selected file format, the Options button is available and you can make the details settings for the saving scanned image. See JPEG detail settings dialog box or TIFF and Multi -TIFF detail settings dialog box.
| Note: |
|
|
When this check box is selected, saving data to a file overwrites the file if the same filename already exists. By default, this check box is not selected.
Selecting this check box displays the File Save Settings dialog box at the next session.
When this check box is not selected, the File Save Settings dialog box does not appear at the next session. In this case, you can start scanning by selecting Scan from the File menu.

You can set the image compression level by moving the slider or entering a number directly. The larger the number is, the smaller the file capacity becomes; however, the image quality deteriorates.
Select an encoding method for using scanned images on the Web (homepages). If the images are not used for the Web, select the standard method instead. For details on the setting, see your online help.

Select Windows when handling scanned images on Microsoft Windows. Select Macintosh when handling them on Apple Macintosh.
 Previous |
 Next |