 |
 Error indicators Error indicators
EPSON Status Monitor (for Windows only)
Running a printer operation check
Troubleshooting printer problems is best handled in two steps: first diagnose the problem, then apply likely solutions until the problem is fixed.
The information that you need to diagnose and solve most common problems is provided by online problem solving, the control panel, the EPSON Status Monitor utility, or by running a printer operation check. Refer to the appropriate section below.
If you have a specific problem relating to print quality, a printout problem not related to print quality, or a paper feeding problem, or if the printer does not print at all, refer to the appropriate section.
To solve a problem, you may need to cancel printing.
 See Canceling Printing See Canceling Printing
You can diagnose and solve most problems by checking the error messages on the LCD screen. If you cannot solve the problems by checking the messages, use the following table and try the recommended solution.
|
Error messages
|
Solution
|
|
A printer error has occurred.
See your documentation.
|
Turn off the printer and then back on. Make sure the protective tapes or papers are not still in the printer. If the error message still appears, contact your dealer.
|
|
Waste ink pad in the printer is saturated. Contact your dealer to replace it.
|
Contact your dealer to replace it.
|
|
Cannot recognize ink cartridges.
|
Make sure the ink cartridges are installed correctly, then try again. See the booklet for details.
|
|
The document is too complex to print with Bluetooth.
|
See the documentation for the device transmitting the data.
|
|
Data error.
The document cannot be printed.
|
See the documentation for the device transmitting the data. (Cause: The data is not available because of a malfunction in the device.)
|
|
Data error.
The document may not print correctly.
|
See the documentation for the device transmitting the data. (Cause: A part of the data is corrupted or cannot be buffered.)
|
|
Cannot recognize the device.
|
Make sure the memory card has been inserted correctly. If you connected a USB storage device, make sure the storage disk has been inserted correctly.
|
|
Cannot recognize the memory card or disk.
|
Make sure the memory card or storage disk has been inserted correctly. If so, check to see if there is a problem with the card or disk and try again.
|
|
A problem occurred while formatting. Formatting canceled.
|
Retry the procedure. If the error reoccurs, there may be a problem with your memory card or storage disk. Check the card or disk and try again.
|
|
An error occurred while saving. Save canceled.
|
|
Cannot create a folder on the memory card or disk. Operation canceled.
|
Insert a new memory card or storage disk and try again.
|
|
Print head cleaning failed.
|
Retry the procedure. If the error message still appears, contact your dealer.
|
EPSON Status Monitor (for Windows only)
If a problem occurs while printing, an error message will appear in the Progress Meter window.
When you need to replace an ink cartridge, click the How To button on the screen, and EPSON Status Monitor will lead you step-by-step through the cartridge replacement procedure.
If an error message appears indicating the parts inside the printer are near the end of their service life, the waste ink pad in the printer is saturated. Contact your dealer to replace it.
 |
Note: |
|
|
When you use your printer as a shared printer on a network with the following combinations of computers, the client operating systems are not able to communicate with the printer, so that some functions are not available for that particular client.
|
Server
|
Client
|
|
Windows XP x64/XP
|
Windows Me/98 SE/2000
|
|
Windows Me/98 SE/2000
|
Windows XP x64/XP
|
|
|
Running a printer operation check
If you are unable to determine the source of the problem, run a printer operation check to help you determine whether the problem comes from the printer or your computer.
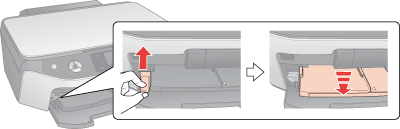
Before running a printer operation check, make sure the front tray is in the paper position (lower position). If it is not, move the tray lever up and reposition the front tray.
 |
Caution: |
|
Note: |
|
|
Before you move the tray lever, make sure no paper or other objects are on the front tray and the front tray is not extended.
|
|
To run a printer operation check, follow these steps.
 |
Make sure both the printer and computer are turned off.
|
 |
Disconnect the cable from the interface connector of the printer.
|
 |
Make sure that A4 size paper is loaded in the sheet feeder, the CD/DVD tray is not inserted in the printer, and that the front tray is in the paper position.
|
 |
Press the  On button to turn on the printer. On button to turn on the printer.
|
 |
Press the  [Setup] button to enter the Setup mode. [Setup] button to enter the Setup mode.
|
A test page prints showing a nozzle check pattern. (If the pattern has gaps, you need to clean the print head.
See Cleaning the Print Head)
-
If the test page prints, the problem probably lies in your software settings, the cable, or your computer. It is also possible that your software may not be installed correctly. Try uninstalling your software and reinstalling it.
See Uninstalling the Printer Software
| |


 Top
Top
 or
or  button to select Maintenance, then press the OK button.
 or
or  button to highlight Nozzle Check, press the OK button, and then press the
  Start button.