Scanning / Using EPSON Smart Panel
Overview of EPSON Smart Panel
 Starting EPSON Smart Panel
EPSON Smart Panel allows you to scan and send data directly to an assigned application or the EPSON photo-sharing site. You can also obtain photos and documents in digital form quickly and easily.
When you install the scanner software, EPSON Smart Panel is also installed at the same time. For information on the installation, refer to the Setup Sheet.
 |
Note:
|
 | -
If you plan to scan films from the EPSON Smart Panel application, refer to the EPSON Smart Panel online help for details.
|
|
PRINT Image Matching
PRINT Image Matching is a standardized method of recording a wider range of color information to enhance the quality of your scanned images. When you use the EPSON Photo Site feature, PRINT Image Matching information is recorded in the resulting JPEG or TIFF image files. Then, by using an application and printer compatible with PRINT Image Matching, you can effortlessly achieve printouts that come to life with a dynamic range of brilliant colors.
 |
Note:
|
 | |
PRINT Image Matching information does not change the image data or the way the image is displayed on a computer screen.
|
|
Starting EPSON Smart Panel
Follow the steps below to start EPSON Smart Panel.
 |
For Windows users:
Click Start, point to All Programs (for Windows XP users) or Programs (for Windows Me, 98, or 2000 users) and then EPSON Smart Panel, then click EPSON Smart Panel.
|
For users of Mac OS 8.6 to 9.x:
Select EPSON Smart Panel from the Apple menu.
For Mac OS X users:
Double-click the Applications folder in Macintosh HD, and then double-click the Smart Panel folder. Finally, double-click the EPSON Smart Panel icon.
 |
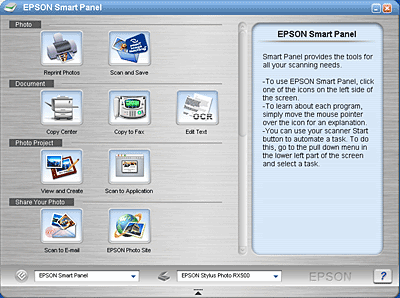
The EPSON Smart Panel window appears.
|

To access an application, click its application icon in the window. See Applications in the EPSON Smart Panel Window for details about the applications available. For details, refer to the EPSON Smart Panel online help.

[Top]
 Starting EPSON Smart Panel
Starting EPSON Smart Panel


