|
Close
Loading Roll Paper
 Attaching the Catcher for 210 mm Roll Paper Attaching the Catcher for 210 mm Roll Paper
Follow the directions below to mount the roll paper holder and load the following types of roll paper.
|
Photo Paper (100 mm x 8 m)
|
|
Photo Paper (210 mm x 10 m)
|
|
Premium Glossy Photo Paper (100 mm x 8 m)
|
|
Premium Glossy Photo Paper (127 mm x 8 m)
|
|
Premium Glossy Photo Paper (210 mm x 10 m)
|
|
Premium Semigloss Photo Paper (100 mm x 8 m)
|
 |
Load roll paper in the roll paper holder.
|
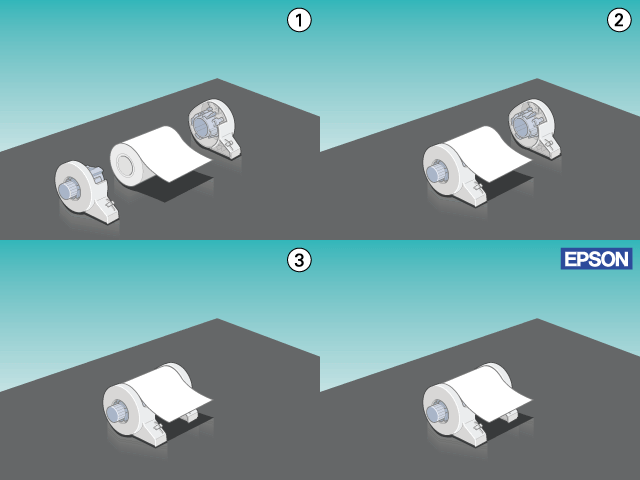
 |  |
Note:
|
 |  | |
Remove the transparent sheet after setting the roll paper into the holders.
|
|
 |
Check that the end of the roll is cut perpendicularly to the edges as shown, using a triangle.
|
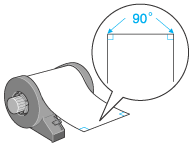
 |  |
Caution:
|
 |  | |
Always use a triangle or other tool to ensure that the end of the roll is cut perpendicularly. A diagonal cut may cause paper feed problems.
|
|
 |
To flatten the roll paper, place it printable-side up between the pages of the instruction booklet packaged with the roll paper to protect it. Then, roll the booklet in the direction opposite of the paper's curl.
|
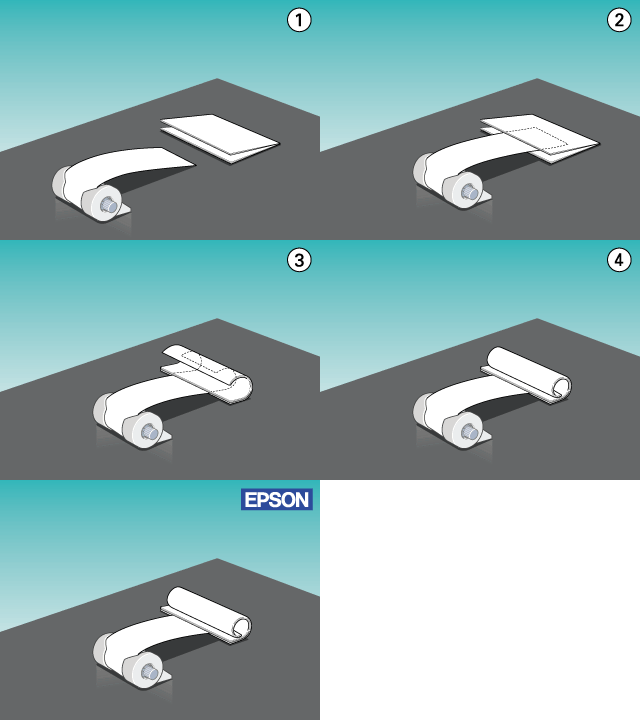
 |
Remove the paper support, lower the output tray, slide out the extension (for other than 210 mm roll paper) or attach the catcher (for 210 mm roll paper), and then turn on the printer.
|
 |  |
Caution:
|
 |  | -
Care should be taken not to damage your eyes with the tip of the catcher.
|
|
 |  | -
Keep the catcher out of the reach of children.
|
|
|
For roll paper other than 210 mm |
|
|
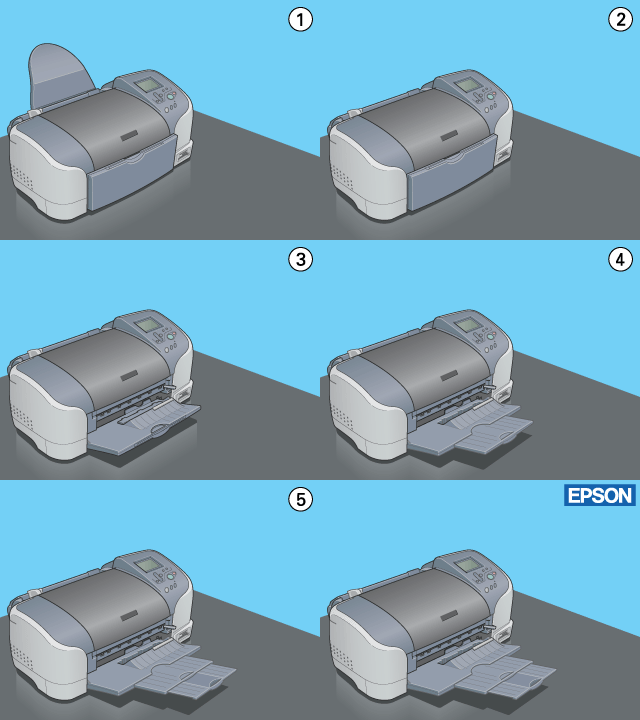
|
|
For 210 mm roll paper |
|
|
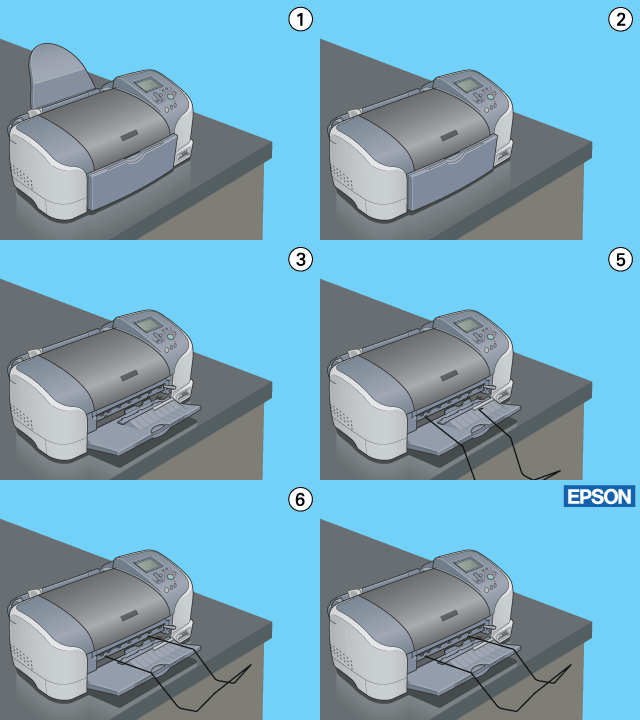
|
 |  |
Note:
|
 |  | |
For details on attaching the catcher for 210 mm roll paper, refer to "Attaching the Catcher for 210 mm Roll Paper".
|
|
 |
Insert the roll paper holder into the slot at the rear of the printer.
|
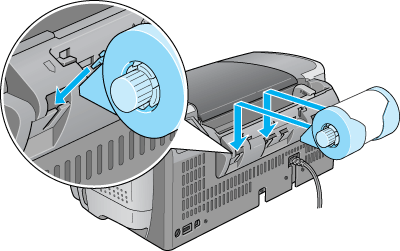
 |
Gently insert the end of the paper into the printers as far as it will go, flush with the right edge guide. Slide the left edge guide against the left edge of the printer.
|
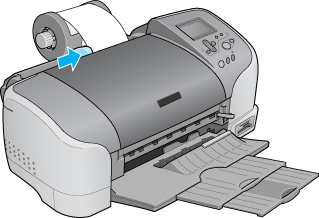
 |
To load the paper correctly, you must hold the paper in place with your hand while you press the  roll paper button. The paper will feed into the printer. roll paper button. The paper will feed into the printer.
|
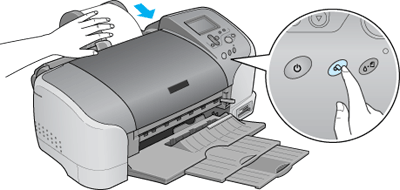
 |
Open the printer cover and make sure that the paper is feeding correctly. If it is not straight, press the  roll paper button for at least three seconds to eject the paper. The maintenance light comes on. Press the roll paper button for at least three seconds to eject the paper. The maintenance light comes on. Press the  roll paper button to clear the error, then feed the paper again. roll paper button to clear the error, then feed the paper again.
|
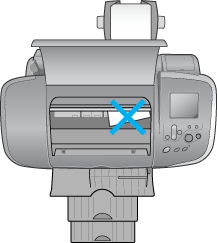
The roll paper is now loaded. Next, set up the printer software and try printing. For details on setting up the printer software, refer to "Printing on Roll Paper".
Attaching the Catcher for 210 mm Roll Paper
To receive the 210 mm roll paper cut off by the cutter, attach the catcher for 210 mm roll paper. Follow the steps below.
 |
Caution:
|
 | -
When using the catcher for 210 mm roll paper, move the printer to the edge of the desk or table. Be careful not to let the printer fall from the desk or table when moving it. In addition, do not place the printer on an unstable surface.
|
|
 | -
Care should be taken not to damage your eyes with the tip of the catcher.
|
|
 | -
Keep the catcher out of the reach of children.
|
|
 |
Note:
|
 | |
You do not need to attach the catcher for 210 mm roll paper when cutting the roll paper other than 210 mm.
|
|
 |
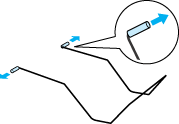
Remove the protective cap from the tip of the catcher for 210 mm roll paper.
|
 |  |
Note:
|
 |  | -
Store the removed protective cap in a safe place.
|
|
 |  | -
Attach the protective cap when storing the catcher for 210 mm roll paper.
|
|
 |
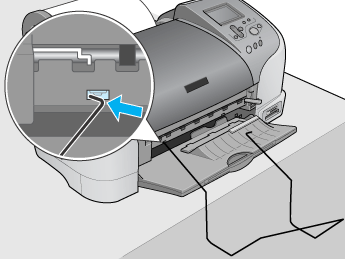
Insert the left tip into the left hole on the front panel of the printer.
|
 |
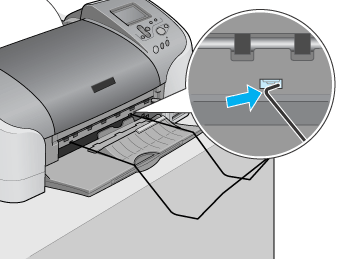
Insert the right tip into the right hole on the front panel of the printer.
|
 |
Caution:
|
 | -
The catcher for 210 mm roll paper can hold only one sheet. When one sheet is printed, immediately remove the sheet from the catcher.
|
|
 | -
To remove the catcher for 210 mm roll paper, pull out the tip of the catcher being inserted in the printer hole diagonally.
|
|

[Top]
Close
|
Attaching the Catcher for 210 mm Roll Paper


 roll paper button. The paper will feed into the printer.


 roll paper button for at least three seconds to eject the paper. The maintenance light comes on. Press the
  roll paper button to clear the error, then feed the paper again.


