 Accessing EPSON StatusMonitor
 Using the Configuration Settings dialog box
Printing with Macintosh / Checking Printer Status and Managing Print Jobs
Accessing EPSON StatusMonitor
Using the Configuration Settings dialog box
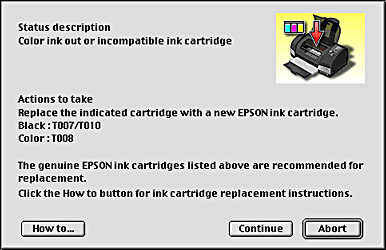
EPSON StatusMonitor monitors the printer. If it detects a printer error, it will inform you with an error message.
When the ink runs low or out, a How to button will appear. Click How to and EPSON StatusMonitor will lead you step-by-step through the ink cartridge replacement procedure.

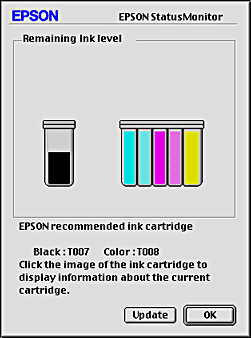
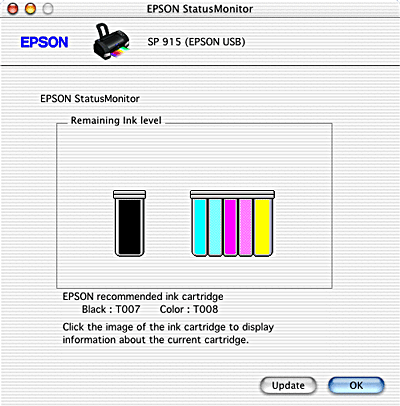
You can also use this utility to check ink levels before printing. When open, EPSON StatusMonitor displays the amount of ink remaining at the time it was opened. To update the ink level information, click the Update button.
Follow the steps below to access EPSON StatusMonitor.
 | Click Print or Page Setup on the File menu of your application. The Print dialog box will open. |
 |
Click the  StatusMonitor icon button or click the StatusMonitor icon button or click the  Utility icon button and then the EPSON StatusMonitor button in the Utility dialog box. The StatusMonitor dialog box will open. Utility icon button and then the EPSON StatusMonitor button in the Utility dialog box. The StatusMonitor dialog box will open.
|
| Note: |
|

 | Double-click Macintosh HD (the default hard disk name), double-click the Application folder, and then double-click the EPSON Printer Utility icon. The Printer List window appears. |
 | Select your printer, and then click OK. The EPSON Printer Utility dialog box appears. |
 | Click the EPSON StatusMonitor button. The StatusMonitor dialog box appears. |

To change the way that the StatusMonitor utility monitors your printer, or to change the way that your printer handles print jobs, follow the steps below.
| Note: |
|
 | Click Print or Page Setup on the File menu of your application. |
 |
Click the  Utility icon button. Utility icon button.
|
 | Click the Configuration button. The Configuration Settings dialog box will appear. |

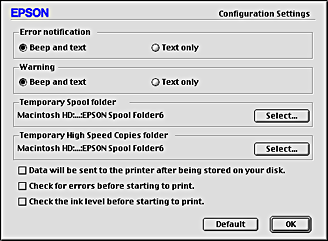
In the Configuration Settings dialog box, you can make the following settings:
|
Error notification |
Choose the method by which EPSON StatusMonitor will notify you in case of an error. |
|
Warning |
Choose how you want EPSON StatusMonitor to notify you if a warning message becomes necessary. |
|
Temporary Spool folder |
Specify the folder in which print data will be temporarily spooled. |
|
Temporary High Speed Copies folder |
Specify the folder in which multiple-copy print data will be temporarily stored. |
|
Data will be sent to the printer after being stored on your disk. |
Select this check box to prevent horizontal banding in printouts that contain images by having the computer temporarily store image data on its hard drive. The computer will then send the image data to the printer as a whole rather than as rectangular bands. |
|
Check for errors before starting to print. |
Select this check box to have the printer check for errors before starting to print. |
|
Check the ink level before starting to print. |
Select this check box to have the printer check the ink levels before starting to print. |
 Previous |
 Next |