Various Printing Options
Poster Printing
 Paper loading
 Driver settings for Windows
 Driver settings for Macintosh
 How to make a poster from your printouts
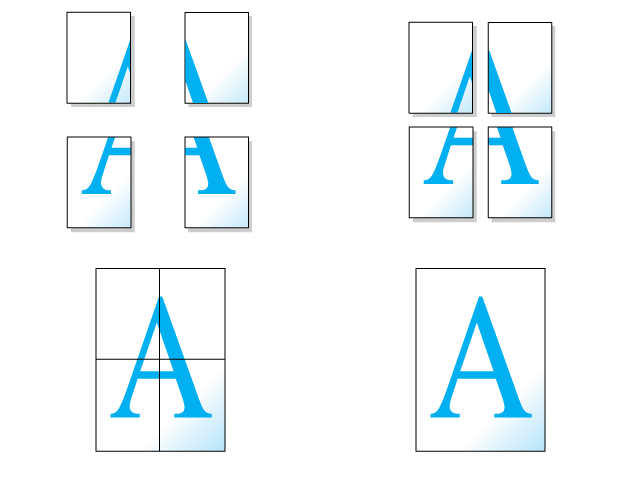
Poster printing allows you to print poster-size images by enlarging one page to cover several sheets of paper.
 |
Note:
|
 | |
This feature is not available with Mac OS X.
|
|
Paper loading
Load paper in your printer.

[Top]
Driver settings for Windows
 |
Access the printer driver.
|
 |
Select the desired Type setting under Paper Options on the Main menu.
|
 |
Select the desired Size setting for the original print data under Paper Options on the Main menu.
|
 |
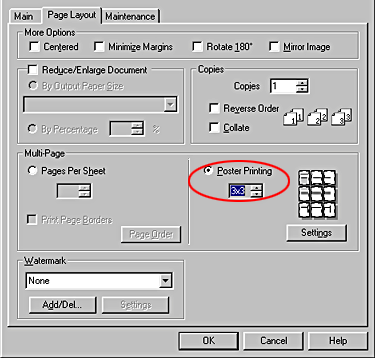
Select the Poster Printing option as the Multi-Page setting on the Page Layout menu, and then click the up or down arrow to select 2x2, 3x3 or 4x4.
|
 |
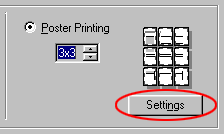
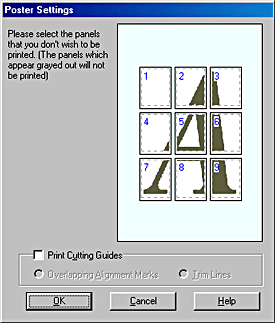
Click Settings to adjust the way your poster will print. The Poster Settings dialog box opens.
|
 |
Make the following settings for poster printing.
|
|
Print Cutting Guides
|
Select this check box to turn the cutting guide options on.
|
|
Overlapping Alignment Marks
|
Slightly overlaps the panels and prints alignment markers so that the panels can be aligned more precisely.
|
|
Trim Lines
|
Prints border lines on the panels to guide you when trimming the pages.
|
 |  |
Note:
|
 |  | |
If you only want to print a few of the panels without printing the entire poster, click the panels that you do not wish to print.
|
|
 |
Click OK to close the Poster Settings dialog box.
|
After finishing all of the above steps, start printing.

[Top]
Driver settings for Macintosh
 |
Access the printer driver.
|
 |
Select the desired Paper Size setting for the original print data.
|
 |
Click OK to save the setting and close the dialog box.
|
 |
Select the desired Media Type setting in the Print dialog box.
|
 |
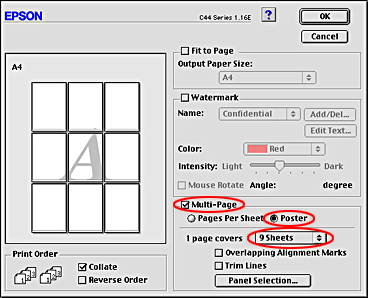
Select the Multi-Page check box in the Layout dialog box, and then select Poster.
|
 |
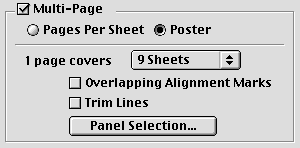
Make the following settings for poster printing.
|
|
1 page covers xx sheets
|
Specifies how many printed sheets of paper the enlarged document page is to cover. You can choose from 4, 9, or 16 sheets.
|
|
Overlapping Alignment Marks
|
Slightly overlaps the panels and prints alignment markers so that the panels can be aligned more precisely.
|
|
Trim Lines
|
Prints border lines on the panels to guide you when trimming the pages.
|
|
Panel Selection
|
Click the panels you do not need to print, and then click the OK button to print the remaining panels.
|
 |  |
Note:
|
 |  | |
If you only want to print a few of the panels without printing the entire poster, click Panel Selection, click the panels that you do not wish to print, and then click OK.
|
|
 |
Click OK to save the setting and close the dialog box.
|
 |
Click Print to start printing.
|

[Top]
How to make a poster from your printouts
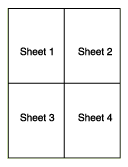
Here is an example of how to make a poster from 4 sheets of your printout. Refer to the accompanying illustrations as well.
 |
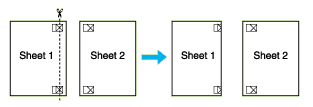
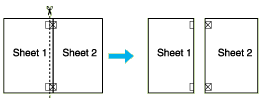
Vertically cut the margin of Sheet 1 along the line connecting the alignment markers as shown in the illustration.
|
 |
Place Sheet 1 on Sheet 2 and align the cross markers on both sheets, then temporarily tape them from the back side of the paper.
|

 |
Cut off the taped sheets along the line between the alignment markers.
|
 |
Align the paper using the alignment markers and tape them from the back side of the paper.
|

 |
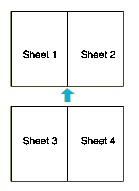
Repeat the instructions from step 1 to step 4 to tape Sheets 3 and 4 as well.
|
 |
Repeat the instructions from step 1 to step 4 to tape the top and bottom faces of the paper.
|
 |
Cut off the remaining margins.
|
 |
Warning:
|
 | |
Be careful when using edged tools.
|
|

[Top]
 Paper loading
 Driver settings for Windows
 Driver settings for Macintosh
 How to make a poster from your printouts
Paper loading
Driver settings for Windows
Driver settings for Macintosh
How to make a poster from your printouts


