 |
 |
|
 |
||
Placing Film or Slides
Removing the Document Mat
To scan film strips or slides, you need to remove the document mat from the scanner cover. This uncovers the transparency unit so your scanner can use it to scan your film or slides.
 |
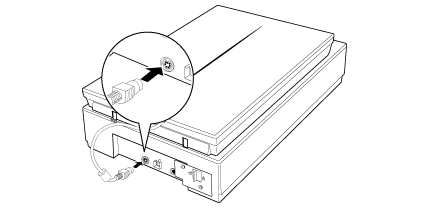
Make sure the cover cable is connected to the scanner’s OPTION port.
|
 Note:
Note:|
Before connecting or disconnecting the cover cable, turn off the scanner using its power button.
|
 |
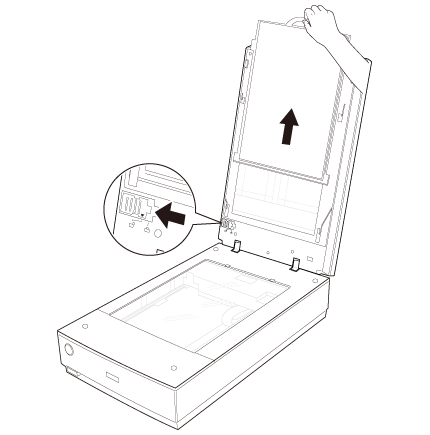
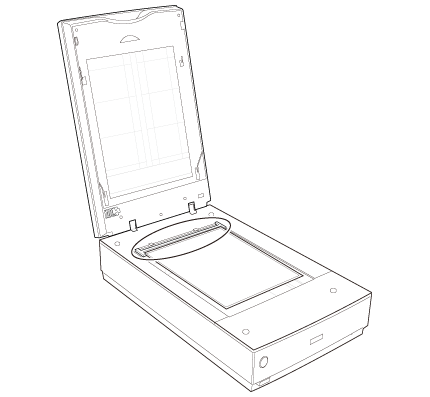
Open the scanner cover and gently slide up the document mat to remove it. Also make sure the transparency unit transportation lock is unlocked.
|
 |
Use a soft cloth to wipe the transparency unit window and the document table before placing your film or slides.
|
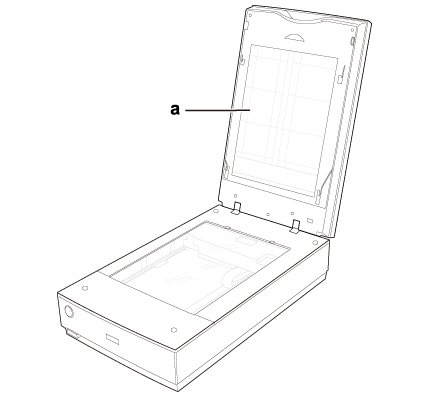
a. transparency unit window
To place film for scanning, see Placing Film in the Holder.
To place slides for scanning, see Placing Slides in the Holder.
Placing Film in the Holder
Placing 35 mm Film Strips
 |
Open the film strip covers on the film holder.
|
 |
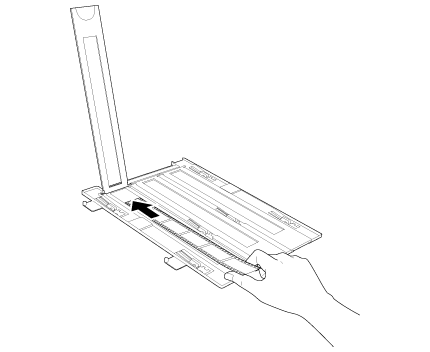
As indicated by the diagram on the film holder, slide up to three film strips all the way into the film holder with the shiny side facing up so that your images and any text on the film strips are not reversed.
|
 Note:
Note:|
Hold the edge of the film gently or use gloves to touch the film; otherwise you may damage the film.
The film holder has cutouts that allow you to adjust the scanner light. When loading film in the holder, make sure it does not cover these cutouts.
Make sure the white stickers on the back of the film holder and the areas around them are not scratched, dusty, or covered in any way. If the areas are obscured, the scanner may have trouble recognizing your film in Full Auto Mode.
Do not cover any of the tiny holes in the film holder or the scanner may have trouble recognizing which film holder you are using.
Use a blower to remove any dust on the surface of the film. Use a blower or a soft cloth to remove any dust on the film holder's clear plastic plate.
|
 |
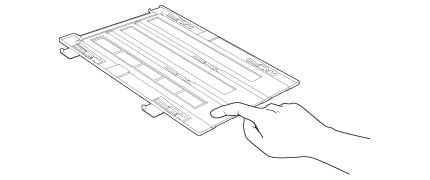
Close the covers and press them down until they click. Then press down on all the edges of the covers to secure them.
|
 |
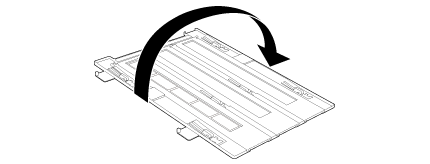
Turn over the film holder.
|
 |
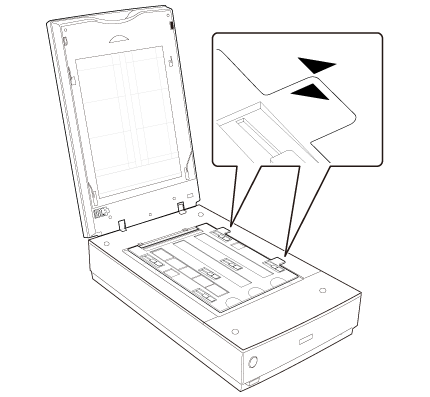
Place the film holder on the document table so that it is aligned with the upper right corner. Align the
 symbol on the edge of the film holder with the symbol on the edge of the film holder with the  symbol on the edge of the document table. symbol on the edge of the document table. |
 |
Make sure you removed the document mat. See Removing the Document Mat.
|
 |
Close the scanner cover.
|
To scan your film, see Starting Epson Scan.
When you are finished scanning film, be sure to replace the document mat before scanning documents or photos. See Replacing the Document Mat.
Placing Medium Format Film
 |
Open the cover on the medium format film holder.
|
 |
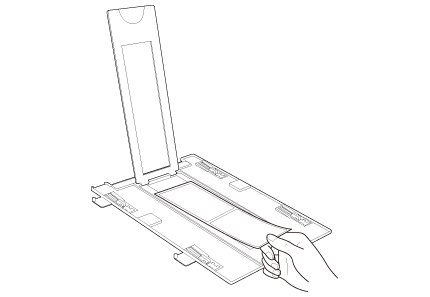
As indicated by the diagram on the film holder, slide the medium format film image into the holder with the shiny side facing up so that your images and any text on the film strips are not reversed. Make sure the entire image frame is positioned in the film holder opening.
|
 Note:
Note:|
Hold the edge of the film gently or use gloves to touch the film; otherwise you may damage the film.
The film holder has cutouts that allow you to adjust the scanner light. When loading film in the holder, make sure it does not cover these cutouts.
Make sure the white stickers on the back of the film holder and the areas around them are not scratched, dusty, or covered in any way. If the areas are obscured, the scanner may have trouble recognizing your film in Full Auto Mode.
Do not cover any of the tiny holes in the film holder or the scanner may have trouble recognizing which film holder you are using.
Use a blower to remove any dust on the surface of the film. Use a blower or a soft cloth to remove any dust on the film holder's clear plastic plate.
|
 |
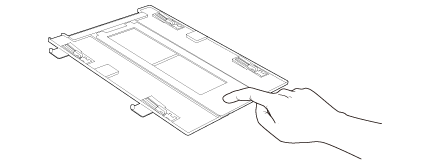
Close the cover over the film and press it down until it clicks. Then press down on all the edges of the cover to secure it.
|
 |
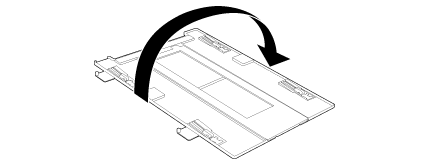
Turn over the film holder.
|
 |
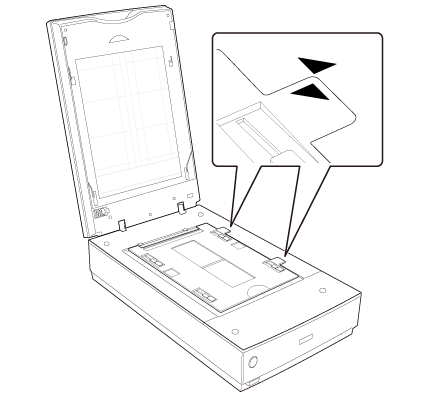
Place the film holder on the document table so that it is aligned with the upper right corner. Align the
 symbol on the edge of the film holder with the symbol on the edge of the film holder with the  symbol on the edge of the document table. symbol on the edge of the document table. |
 |
Make sure you removed the document mat. See Removing the Document Mat.
|
 |
Close the scanner cover.
|
To scan your film, see Starting Epson Scan.
 Note:
Note:|
You cannot use Full Auto Mode to scan medium format film.
|
When you are finished scanning film, be sure to replace the document mat before scanning documents or photos. See Replacing the Document Mat.
Placing 4 × 5 inch Film
 |
Open the covers on the 4 × 5 inch film holder.
|
 |
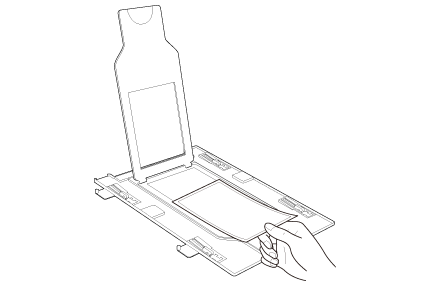
As indicated by the diagram on the film holder, place the film into the film holder with the shiny side facing up so that your images and any text on the film strips are not reversed. Make sure the entire image frame is positioned in the film holder opening.
|
 Note:
Note:|
Hold the edge of the film gently or use gloves to touch the film; otherwise you may damage the film.
The film holder has cutouts that allow you to adjust the scanner light. When loading film in the holder, make sure it does not cover these cutouts.
Make sure the white stickers on the back of the film holder and the areas around them are not scratched, dusty, or covered in any way. If the areas are obscured, the scanner may have trouble recognizing your film in Full Auto Mode.
Do not cover any of the tiny holes in the film holder or the scanner may have trouble recognizing which film holder you are using.
Use a blower to remove any dust on the surface of the film. Use a blower or a soft cloth to remove any dust on the film holder's clear plastic plate.
|
 |
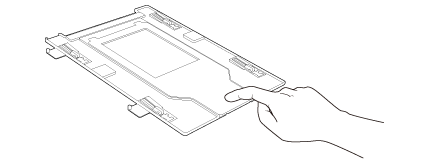
Close the cover over the film and press it down until it clicks. Then press down on all the edges of the cover to secure it.
|
 |
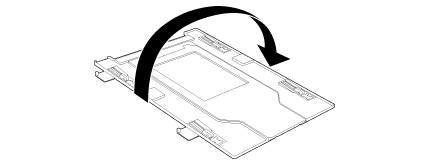
Turn over the film holder.
|
 |
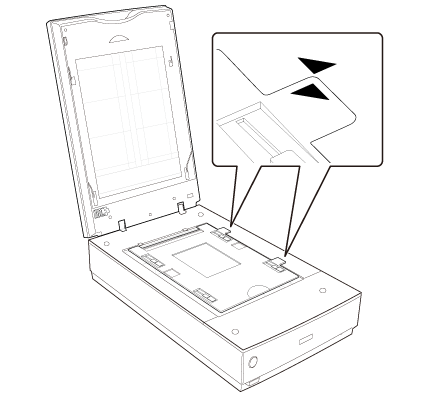
Place the film holder on the document table so that it is aligned with the upper right corner. Align the
 symbol on the edge of the film holder with the symbol on the edge of the film holder with the  symbol on the edge of the document table. symbol on the edge of the document table. |
 |
Make sure you removed the document mat. See Removing the Document Mat.
|
 |
Close the scanner cover.
|
To scan your film, see Starting Epson Scan.
 Note:
Note:|
You cannot use Full Auto Mode to scan 4 × 5 inch film.
|
When you are finished scanning film, be sure to replace the document mat before scanning documents or photos. See Replacing the Document Mat.
Placing Slides in the Holder
You can scan up to twelve 35 mm slides at a time using the slide holder.
 Note:
Note:|
You cannot scan negative slides.
Make sure the white stickers on the back on the film holder and the areas around them are not scratched, dusty, or covered in any way. If the areas are obscured, the scanner may have trouble recognizing your slides in Full Auto Mode.
Do not cover any of the tiny holes in the film holder or the scanner may have trouble recognizing which film holder you are using.
|
 |
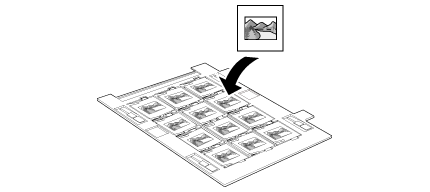
Place up to twelve slides in the 35 mm slide holder with the shiny base side facing down. Your image should appear backwards on the side that faces up, as shown by the illustration on the film holder. The top of your images should face the open end of the film holder as shown below.
|
Use a blower to remove any dust on the surface of the film. Use a blower or a soft cloth to remove any dust on the film holder's clear plastic plate.
The film holder has cutouts that allow you to adjust the scanner light. When loading film in the holder, make sure it does not cover these cutouts.
 |
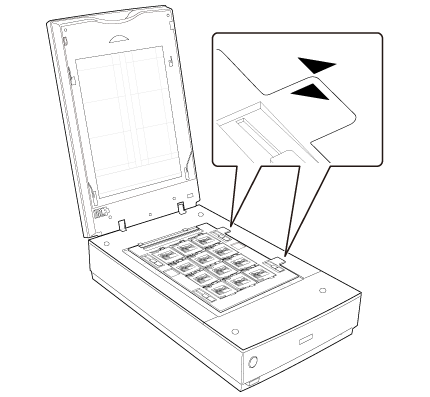
Place the film holder on the document table so that it is aligned with the upper right corner. Align the
 symbol on the edge of the film holder with the symbol on the edge of the film holder with the  symbol on the edge of the document table. symbol on the edge of the document table. |
 |
Make sure you removed the document mat. See Removing the Document Mat.
|
 |
Close the scanner cover.
|
To scan your slides, see Starting Epson Scan.
When you are finished scanning slides, be sure to replace the document mat before scanning documents or photos. See Replacing the Document Mat.
Placing Film in the Film Area Guide
You can scan film that cannot be placed in the film holders (up to 8 × 10 inch film) using the film area guide in Professional Mode. When scanning film using the film area guide, always select Film (with Film Area Guide) as the Document Type.
 Note:
Note:|
You cannot use DIGITAL ICE Technology when scanning film with the film area guide.
If you scan 8 × 10 inch film at 4800 dpi resolution and 24 bit color as the Image Type, do not save it in BMP, Tiff, or JPEG format.
When scanning using the film area guide, striped (newton) rings may appear in your scanned images.
|
 |
Place the film area guide on the document table so that it is aligned with the upper corner.
|
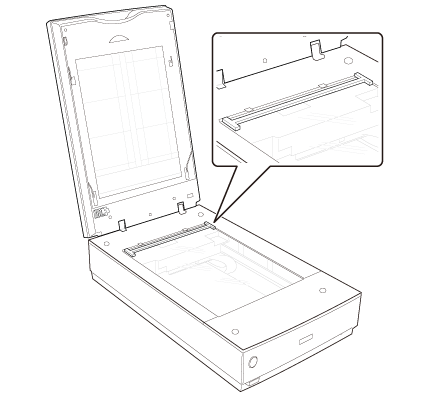
The film area guide has cutouts that allow you to adjust the scanner light. When loading film in the guide, make sure it does not cover these cutouts.
Use a blower to remove any dust on the surface of the film.
 |
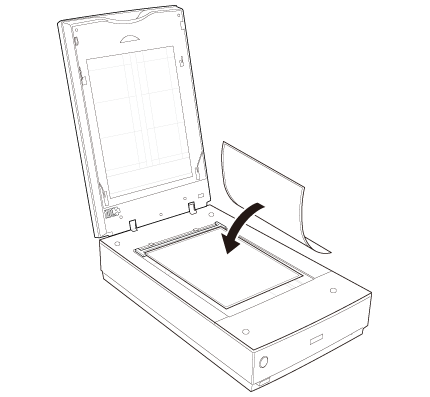
Place the film in the film area guide (up to 8 × 10 inch film) with the shiny base side facing down. Your images and any wording on the film should appear backwards on the side that faces up. Make sure the entire image frame is positioned in the film area guide opening.
|
 Note:
Note:|
Leave the part of the film area guide shown below uncovered or colors in your scans will be affected.
|
 |
Make sure you removed the document mat. See Removing the Document Mat.
|
 |
Close the scanner cover.
|
To scan your film, see Starting Epson Scan.
 Note:
Note:|
You cannot use Full Auto Mode or Home Mode when scanning film with the film area guide.
|
When you are finished scanning film, be sure to replace the document mat before scanning documents or photos. See Replacing the Document Mat.
Replacing the Document Mat
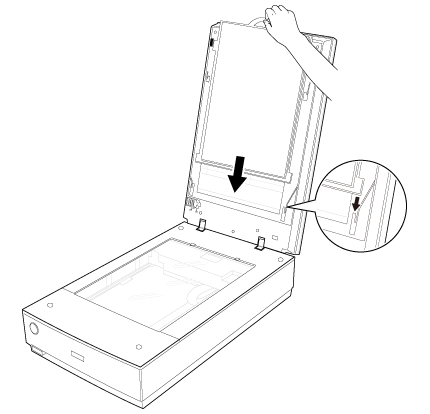
Replace the document mat by sliding it into the notches in the scanner cover. Make sure the white surface faces outwards.
