 |
|
|||
 |
||||
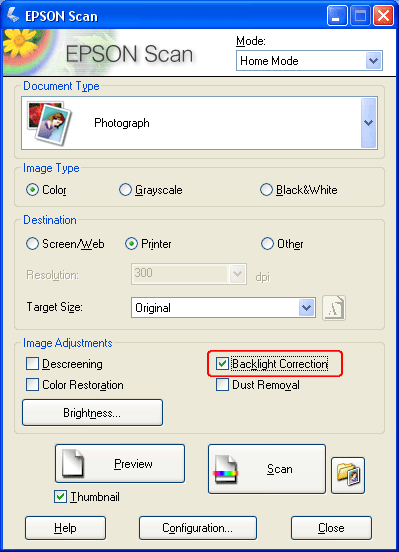
Fixing Backlit Photos
Using the Backlight Correction feature in Epson Scan, you can remove shadows from photos that have too much background light. You can fix printed photos, film, or slides automatically as you scan them.
 Note:
Note:|
Backlight Correction is not available in Full Auto Mode.
|
|
Original image
|
Backlight Correction applied
|
 |
 |
Follow these steps to fix backlit photos using Epson Scan.
 |
Place your original. See one of these sections for instructions.
|
Documents or photos: Placing Documents or Photos.
Film or slides: Placing Film or Slides.
 |
Start Epson Scan. See one of these sections for instructions.
|
Documents or photos:
Film or slides:
 |
When the Epson Scan window appears, select the basic settings for the type of original(s) you are scanning, then select the destination setting for the way you will use your image(s). See one of these sections for instructions.
|
Documents or photos: Selecting Basic Settings
Film or slides: Selecting Basic Settings
 |
Click the Preview button to preview your image(s), then select your scan area. See one of these sections for instructions.
|
Documents or photos: Previewing and Adjusting the Scan Area
Film or slides: Previewing and Adjusting the Scan Area
 |
Do one of the following to select the Backlight Correction option.
|
Home Mode: Click the Backlight Correction checkbox.
Professional Mode: Scroll down to the Adjustments area and click the Backlight Correction checkbox. If you want to increase or decrease the level of the backlight correction effect, click the + (Windows) or  (Mac OS X) button next to the option and select a setting in the Level list.
(Mac OS X) button next to the option and select a setting in the Level list.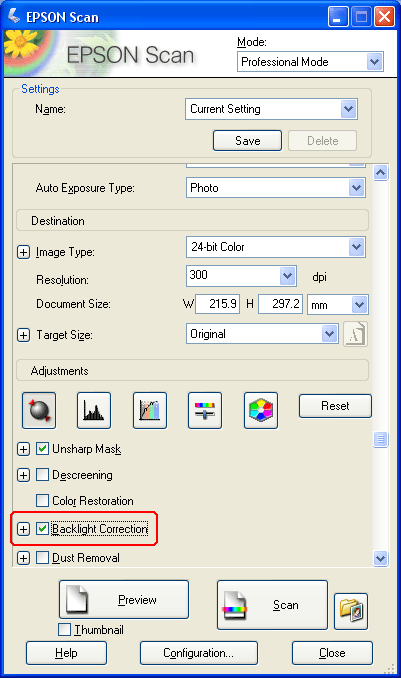
 |
Make any other necessary image adjustments. See one of these sections for instructions.
|
Documents or photos: Adjusting the Color and Other Image Settings
Film or slides: Adjusting the Color and Other Image Settings
 |
Size your image as necessary. See one of these sections for instructions.
|
Documents or photos: Selecting the Scan Size
Film or slides: Selecting the Scan Size
 |
Click the Scan button to scan and correct backlighting in your image(s).
|
What happens next depends on how you started Epson Scan. See one of these sections for details.
Documents or photos: Finishing the Scan
Film or slides: Finishing the Scan