 |
Cleaning and Replacing the Paper Path Guide
After you have used the ADF for a long time, a line of dots may begin to appear on the scanned images. If this happens, follow the steps below to clean the paper path guide. If the problem persists, you may need to replace the paper path guide with the spare one that came with your ADF.
 |
Turn off the scanner using its power switch.
|
 |
Push in the support on the edge of the output tray on the ADF.
|
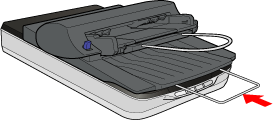
 |
Remove the paper support from the input tray of the ADF.
|
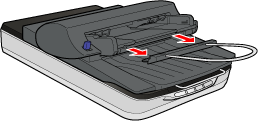
 |
If the ADF is installed on your scanner, disconnect its cable from the scanner’s OPTION port, open the ADF, and lift it off of the scanner.
|
 |
Turn the ADF over onto its top and carefully place it on a stable surface.
|
 |
Lift up the edges of the clips holding the paper path guide in place and push the clips all the way out of the notches to release them.
|
 |
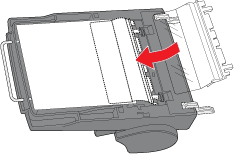
Remove the paper path guide in the direction shown below.
|
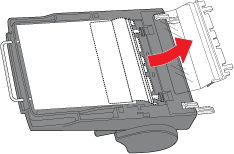
 |
Using a soft, dry cloth, wipe the clear portion of the paper path guide to clean off any dust or dirt.
|
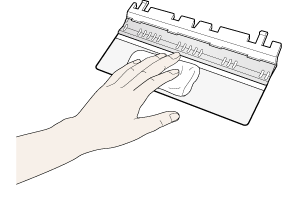
 |
Slide the paper path guide back into place beneath the white document mat on the ADF. Then insert the clips beneath the notches and push them all the way back until they click into place.
|
If you still see a line of dots in your images, follow these steps again to remove the paper path guide and replace it with the spare one that came with your ADF.
|  |


