 |
|
|||
 |
||||
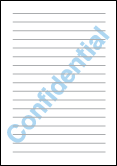
Watermark Printing (For Windows Only)
Watermark printing allows you to print a text-based or image-based watermark on your document.
 Note:
Note:|
This feature is not available with borderless printing.
|
Printing the watermark
 |
Access the printer settings.
|
 |
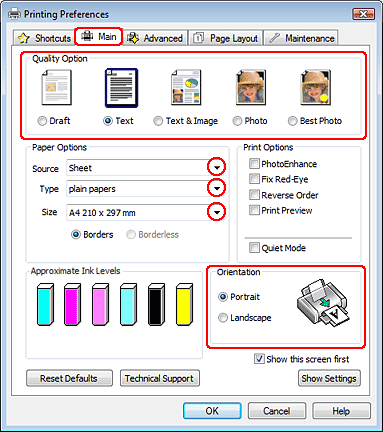
Click the Main tab, then select one of the following Quality Option settings:
|
Draft for rough drafts with reduced print quality
Text for text-only documents with higher text quality
Text & Image for higher quality documents with text and images
 |
Select Sheet as the Source setting.
|
 |
Select the appropriate Type setting.
|
 |
Select the appropriate Size setting.
|
 |
Select Portrait (tall) or Landscape (wide) to change the orientation of your printout.
|
 |
Click the Page Layout tab, choose the desired watermark from the Watermark list, then click Settings.
|
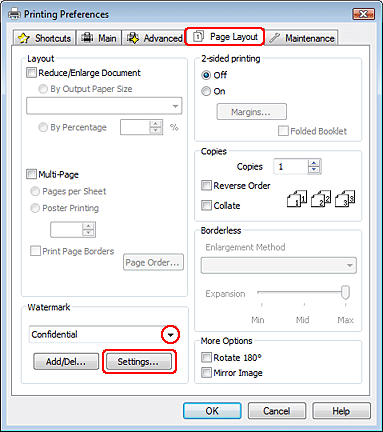
If you want to create your own watermark, see the following instructions.
 |
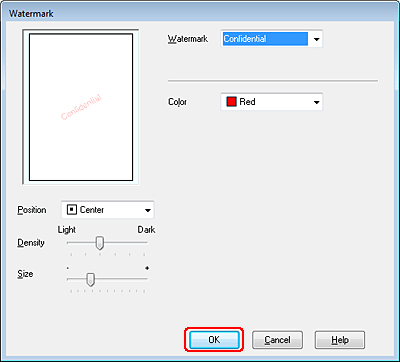
Specify the settings you want for the watermark. You can change the position and size of the watermark by dragging the image within the preview window.
|
 |
Click OK to return to the Page Layout window.
|
 |
Click OK to close the printer settings window.
|
After completing the steps above, print one test copy and examine the results before printing an entire job.

Creating your own watermark
You can add your own text-based or image-based watermarks to the Watermark list.
|
Click Add/Del under Watermark on the Page Layout window. The following window appears.
|

|
Do one of the following:
|
To use an image file as a watermark, select BMP. Click Browse to locate the bitmap file you want to use, then click OK. Type a name for your watermark in the Name text box, then click Save.
To create a text-based watermark, select Text. Type your text in the Text box. This text will also be used as the watermark name. If you want to change the watermark name, type a new name in the Name text box, then click Save.
|
Click OK to return to the Page Layout window.
|
|
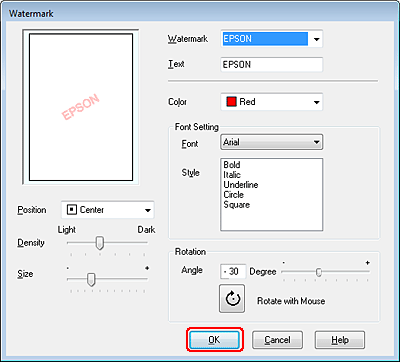
Click Settings. The following window appears:
|
|
Make sure that the appropriate watermark is selected in the Watermark list, then select Color, Position, Density, Size, Font, Style, and Angle settings. (For details, see the online help.) Your settings are reflected in the preview window.
|
|
When you finish making settings, click OK.
|