 Step.1 Turning on the scannerStep.2 Placing your materials on the scannerStep.3 Starting the software and scanning an imageStep.4 Saving the result as an image file
Overview / Basic Scanning Procedure
EPSON Scan provides three modes for you to make any scanning settings; Home Mode, Office Mode, and Professional Mode. This section describes how to scan an image in the Home Mode. The Home Mode lets you scan images using the basic settings. For more details, see Choosing and Changing the Scanning Mode.
| Note: |
|
Turn on the scanner by pressing the  Power button. The READY light comes on.
Open the document cover and place the document face down on the document table.
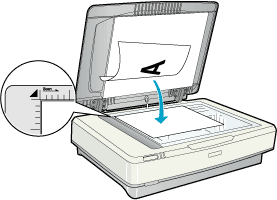
 | For more details, see Placing Photos and Documents on the Scanner |
You can start EPSON Scan in the following ways.
This section provides you how to start EPSON Scan from Photoshop Elements. For details on the another way to start EPSON Scan, see Starting EPSON Scan.
 |
Start Adobe Photoshop Elements. Click Start, point to All Programs (for Windows XP users) or Programs (for Windows Me, 98, or 2000 users), and select and click Adobe Photoshop Elements. |
 | Select Import from the File menu, and then choose EPSON GT-15000. EPSON Scan starts. |
| Note for Windows XP users: |
|
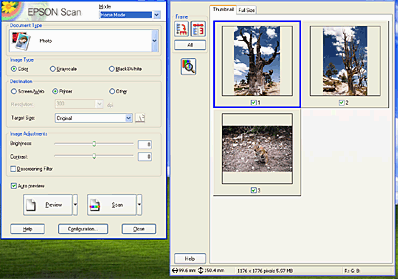
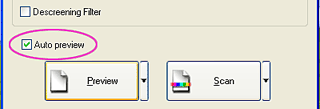
 | EPSON Scan automatically previews the images, which appear in the Preview window. |
| Note: |
|
If you want to make more settings, click Pause and then click Options to open the Options dialog box. For more details on settings, see the online help by clicking the Help or ? button in the Option dialog box.
 | Specify the Document Type, Image Type, and Destination settings to match your images. If necessary, preview the images again by clicking Preview. |

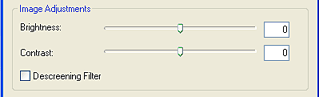
 | Specify the output size of the scanned image as the Target Size and make adjustments using the image quality adjustment tools, if necessary. |
 | Click Scan. EPSON Scan starts scanning. The scanned image is sent to Adobe Photoshop Elements. |
| Note: |
|
|
After an image is scanned, be sure to save it, using the steps below.
|
| Select Save As from the File menu in Adobe Photoshop Elements. |
|
| Type a file name, select a file format, and then click Save. See the following section for the file formats. |
The following table lists some common image file formats. Select an appropriate format supported by your image processing application when you save image files.
|
Format (File extension) |
Explanation |
|
BITMAP (*.BMP) |
Standard image file format used in Windows. Most Windows application including word processing application can read and prepare images in this format. |
|
JPEG (*.JPG) |
Compressed file format. The compression quality can be selected; the JEPG format enables relatively high compression ratio. However, the higher the compression ratio is, the lower the image quality becomes. (Note that the original data cannot be restored.) In addition, the quality deteriorates every time the data is saved. The TIFF format is recommended in cases where modification, retouch and the like are required |
|
TIFF (*.TIF) |
File format created for exchanging data among many applications such as graphic and DTP software. When scanning black & white images, you can specify the compression type. |
|
Multi-TIFF (*.TIF) |
TIFF format where multiple pages are saved to the same file, When you scan documents using the Automatic Document Feeder, they all stored in the same file. (With other formats, each document is saved in a separate file.) However, to open the Multi-TIFF files, you need an application supporting this format. |
|
PDF (*.PDF) |
Document format which is independent of platforms. To use PDF documents, you need Adobe Acrobat Reader or Acrobat. When you scan documents using the Automatic Document Feeder, multiple pages are saved to a single file. |
 Previous |