How To
Scan Multiple Images Simultaneously
You can simultaneously scan multiple films and documents set together in the scanner as separate images.
 |
Note:
|
 | |
Depending on the application, you may not be able to scan multiple images.
|
|
Follow the steps below to scan multiple sources using the Home Mode.
 |
Set the source in the scanner. If necessary, see the section below.
|
 |  |
Note:
|
 |  | |
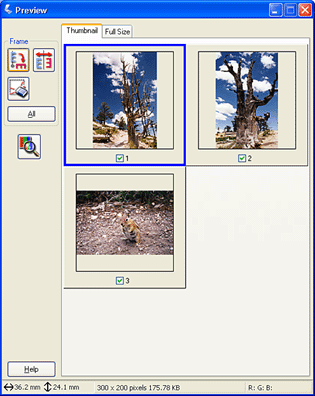
If you plan to preview images using the Thumbnail method, while scanning multiple photos, position each photo at least 20 mm apart from its adjacent photos.
|
|
 |
Start EPSON Scan and then select the Home Mode. For details on how to select a scanning mode, see Changing a scanning mode.
|
The following window appears.

 |
Specify the Document Type, Image Type, and Destination settings to match your images.
|
 |
Click Preview to preview the images.
|
 |  |
Note:
|
 |  | -
If the Auto preview check box is selected, preview scanning automatically starts when you access the Home Mode. If this check box is cleared, previewed image does not appear automatically.
|
|

 |  | -
You can select a preview method: Thumbnail Preview or Normal Preview. Click the small arrow to the right of the Preview button and then select Thumbnail or Normal.
|
|

 |
In the Thumbnail Preview window:
EPSON Scan automatically locates the multiple films or documents, and then preview them as thumbnail images. Select the number check box of an image you want to scan.
|
 |  |
Note:
|
 |  | |
Depending on the sources you want to scan, EPSON scan may not be able to automatically locate the target images, or preview the images as thumbnails. In this case, preview the images in the Normal Preview window.
|
|

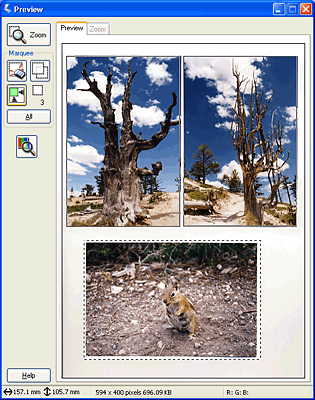
In the Normal Preview window:
Create marquees on the previewed image to select an area you want to scan. You can create up to 50 marquees. For more details, see Using Marquees.

 |  |
Note:
|
 |  | |
When the output size of the scanned image is already decided, select an appropriate setting from the Target Size list. A marquee proportional to the measurements of the Target Size setting appears in the Preview window. You can move this marquee to the area of the image you want to scan. For more details, see the online help.
|
|
 |
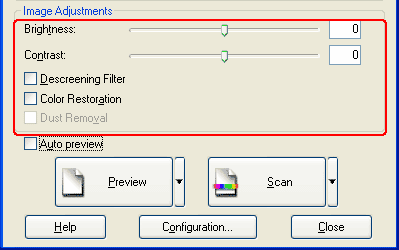
Specify the Image Adjustments settings, if necessary.
|

 |  |
Note:
|
 |  | |
For some settings, you can apply the same modifications to all of the images at once by clicking All. (In Normal Preview, you need to make marquees.) For detail, see Using Marquees.
|
|
 |
Click Scan. EPSON Scan starts scanning.
|
The scanned images are sent to the application or saved in the specified folder.

[Top]


