 Making the Highlight settingMaking the Shadow settingMaking the Gamma settingApplying a preset tone curve
Optimizing Scanning / Adjusting Image Quality
Adjust brightness and contrast before adjusting image color. Brightness and contrast settings should be made in the order shown above.
Highlights are the brightest areas of an image. Follow these steps to adjust the Highlight setting.
 |
Click the  Image Controls button in the Preview window. Image Controls button in the Preview window.
|
 | Click the eyedropper button under Highlight. |

The pointer changes to an eyedropper, with movement restricted to within the Preview window.
 | Move the eyedropper to the location you want to select as the highlight point and click it. |
The brightness of the pixel at the point you click is set as the highlight level, and the other parts of the image are adjusted accordingly.

 | To change the highlight level of the point you selected, move the Highlight slider left or right, or enter a value between 61 and 490 in the text box. |
Shadows are the darkest areas of an image. Follow these steps to adjust the Shadow setting.
|
|
Click the Image Controls button in the Preview window.
|
|
| Click the eyedropper button under Shadow. |

The pointer changes to an eyedropper, with movement restricted to within the Preview window.
|
| Move the eyedropper to the location you want to select as the shadow point, and then click. |
The brightness of the pixel at the point you click is set as the shadow level, and the other parts of the image are adjusted accordingly.

|
| To change the shadow level of the point you selected, move the Shadow slider left or right, or enter a value between 0 and 60 in the text box. |
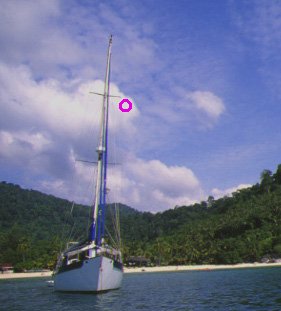
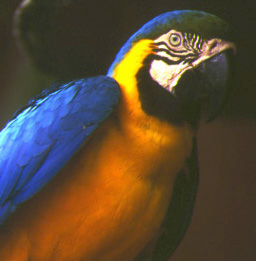
Gamma is the difference in contrast between the light tones and dark tones of an image. Changes in the gamma level only affect mid-tones, and can be effective for bringing out details normally hidden in shadow or highlights.
|
original image |
|
|
 |
|
|
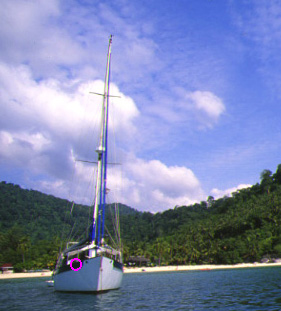
set to 1.80 |
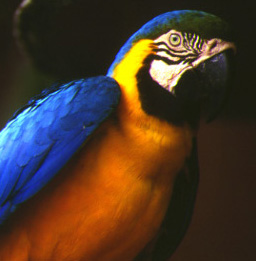
set to 2.60 |
|
 |
 |
Follow these steps to adjust the Gamma setting.
|
|
Click the Image Controls button in the Preview window.
|
|
| Move the Gamma slider left or right, or enter a value between 0.5 and 5.0 in the text box. |

The Tone Correction feature provides preset tone correction curves that let you adjust the contrast within an image. This gives you more control over the image when used in conjunction with the settings in the Image Controls dialog box.
Click the  Tone Correction button in the Preview window, then select a preset tone curve from the Tone Curve Name list. The preset tone curves are described below.
Linear
A linear tone curve has no tone correction. Use this setting if you are satisfied with the tone of the previewed image.
Lighten
Adjusts darker images (like underexposed film) to make them slightly brighter.

Darken
Adjusts brighter images (like overexposed film) to make them slightly darker.

Flat Contrast
Flattens high contrast images to make them look more natural.

High Contrast
Increases the contrast of dull images.
Open Shadow
Improves details in the dark areas of images.
 | Note: |
| See Tone Correction for more information on tone correction. |
 Previous |
 Next |