 |
 Printer settings for Windows Printer settings for Windows
 How to make a poster from your printouts How to make a poster from your printouts
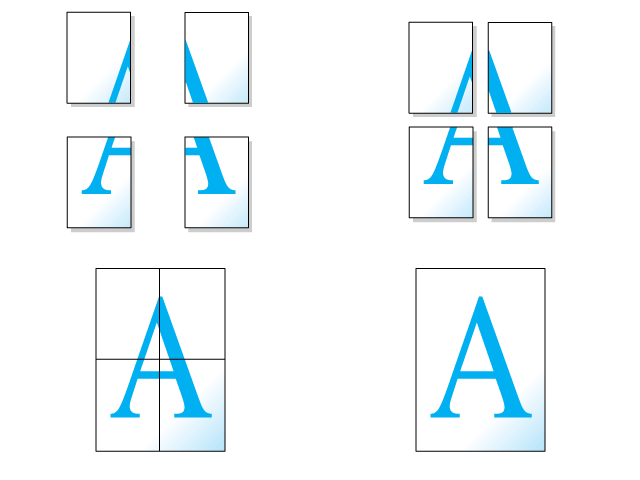
Poster printing allows you to print poster-size images by enlarging one page to cover several sheets of paper.
 |
Note: |
Printer settings for Windows
 |
Access the printer settings.
|
 |
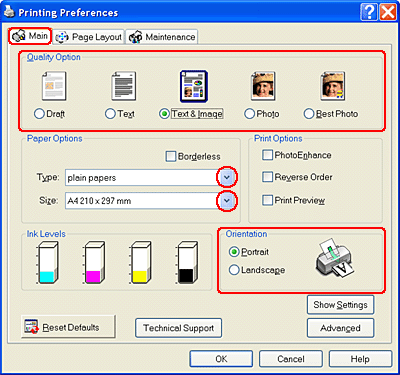
Click the Main tab, then select one of the following Quality Options:
|
 |
Select the appropriate Type setting.
|
 |
Select the size of the paper you are using as the Size setting.
|
 |
Select Portrait (tall) or Landscape (wide) to change the orientation of your printout.
|
 |
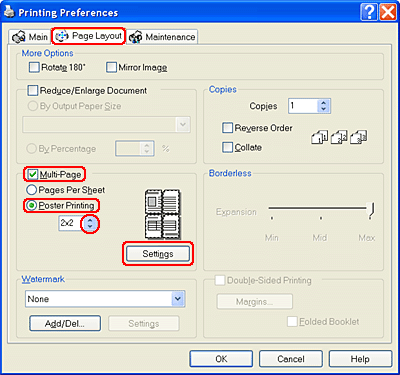
Click the Page Layout tab and select Multi-Page, then select Poster Printing. Click the up or down arrow to select 2x2, 3x3, or 4x4.
|
 |
Click Settings to adjust the way your poster will be printed. The Poster Settings window opens.
|
 |
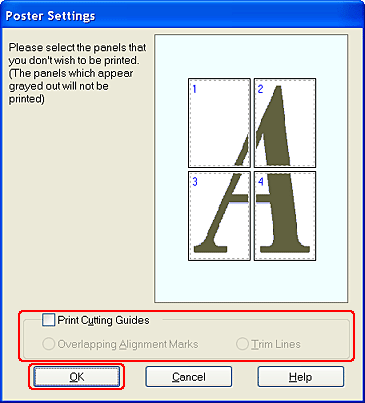
Make the following settings:
|
|
Print Cutting Guides
|
Prints guide lines for cutting.
|
|
Overlapping Alignment Marks
|
Slightly overlaps the panels and prints alignment markers so that the panels can be aligned more precisely.
|
|
Trim Lines
|
Prints border lines on the panels to guide you when trimming the pages.
|
 |  |
Note: |
 |  |
|
If you want to print only a few of the panels without printing the entire poster, click the panels that you do not want to print.
|
|
 |
Click OK to close the Poster Settings window.
|
After completing the steps above, print one test copy and examine the results before printing an entire job. Then follow the instructions.
 How to make a poster from your printouts How to make a poster from your printouts
How to make a poster from your printouts
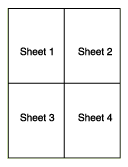
Here is an example of how to make a poster with 2x2 selected under Poster Printing and Overlapping Alignment Marks selected as the print cutting guide.
 |
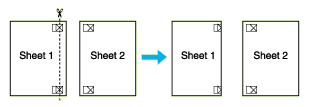
Cut off the margin of Sheet 1 along a vertical line through the center of the top and bottom cross marks:
|
 |
Place the edge of Sheet 1 on top of Sheet 2 and align the cross marks, then temporarily tape the two sheets together from the back:
|

 |
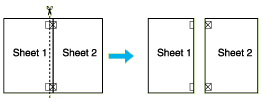
Cut the taped sheets in two along a vertical line through the alignment markers (this time, a line to the left of the cross marks):
|
 |
Align the edges of the paper using the alignment markers and tape them together from the back:
|

 |
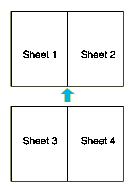
Repeat the instructions from step 1 to step 4 to tape Sheets 3 and 4 together.
|
 |
Repeat the instructions from step 1 to step 4 to tape the top and bottom edges of the paper:
|
 |
Cut off the remaining margins.
|
|  |


 Printer settings for Windows


 Top
Top