 |
 Loading paper Loading paper
 Printer settings for Windows Printer settings for Windows
 Printer settings for Mac OS X Printer settings for Mac OS X
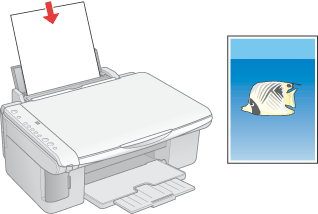
Refer to the section below for details on loading paper.
When using special EPSON paper, refer to the section below.
Printer settings for Windows
 |
Note: |
 |
|
For instructions on printing photos without white borders, see the following section.
 See Borderless Printing See Borderless Printing
|
|
To print photos with borders, follow these steps:
 |
Open the photo you want to print.
|
 |
Access the printer settings:
|
 |
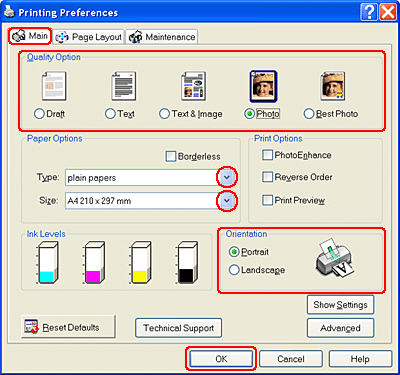
Click the Main tab, then select one of the following Quality Options:
|
 |
Select the appropriate Type setting.
|
 |
Select the paper size of your data as the Size setting. You can also define a custom paper size. For details, see the online help.
|
 |
Select Portrait (tall) or Landscape (wide) to change the orientation of your printout.
|
 |  |
Note: |
 |  |
|
For more print settings, click the Advanced button. Click the Help button for more information.
|
|
 |
Click OK to close the printer settings window.
|
 |
Print your photo.
|
Printer settings for Mac OS X
 |
Open the photo you want to print.
|
 |
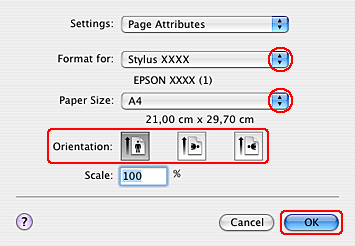
Access the Page Setup dialog box.
|
 |
Select the appropriate Format for setting.
|
 |
Select the appropriate Paper Size and Orientation settings. You can also define a custom paper size. For details, see the online help.
|
 |
Click OK to close the Page Setup dialog box.
|
 |
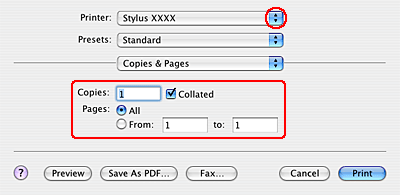
Access the Print dialog box.
|
 |
Select the Printer setting that matches the Format for setting you selected in step 3. Then select the Copies & Pages settings.
|
 |
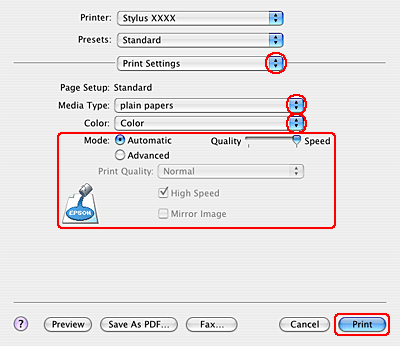
Select Print Settings from the pop-up menu.
|
 |
Select the appropriate Media Type, Color, and Mode settings. See online help for details of Print Settings.
|
 |  |
Note: |
 |  |
|
For more print settings, click the Advanced button. Click the Help button for more information.
|
|
 |
Click Print to start printing.
|
|  |


