|
|
Knowledge
Base FAQ's & Technical Guides |
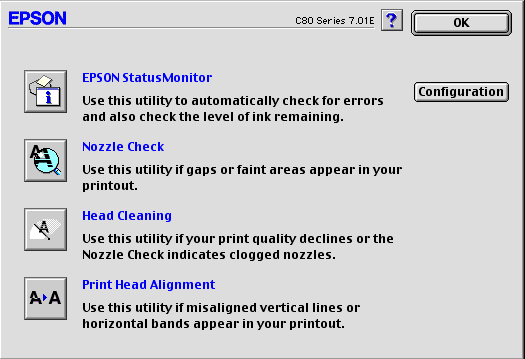
The Nozzle check utility is located in the Printer
driver utilities window, to access the utilities provided in the EPSON
driver you need to click on the desktop and then click File and then select
Print desktop. Now click on the Tools icon (spanner and screwdriver) and
select the Nozzle check utility. Then simply follow the onscreen instructions.
To proceed please click the link for instructions on how to get to the
Printer utilities options window:
How do I use the printer software Utilities on MAC OS Classic?
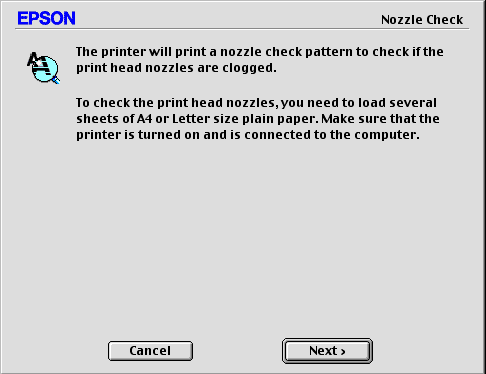
Click the icon for Nozzle check.
Click Next.
Compare your print out to the examples on the screen. If there are any breaks or gaps missing in your print out you will need to click Clean and follow the instructions.
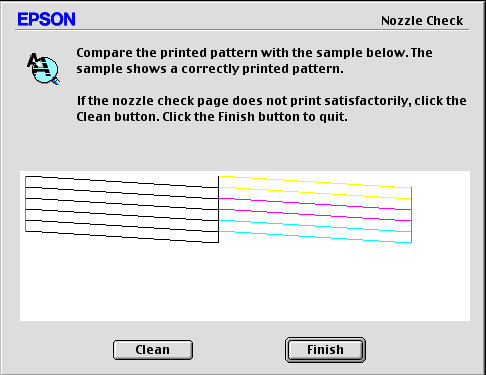
Repeat the process until the nozzle
check is correct. If after many head cleans the result is still not satisfactory
it is recommended that you replace the ink cartridges.
Please note: If your cartridges have been installed for
over 6 months it is also recommended that you replace them if print quality
problems occur.
If the nozzle check is correct but your print still appears Blurred or Vertically misaligned you may need to realign your Print heads. For instructions on how to do this please click the link:
How do I realign the printer heads to resolve broken text?
Article: KB020113 Language: English Product Range: Ink Jet