 |
 |
|
||
 |
||||
Printing on Roll Paper
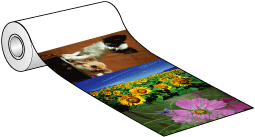
Using roll paper, you can print banners or a series of photos or panoramics.

 Note:
Note:|
Using EPSON Easy Photo Print, which is included on the CD-ROM, is the easiest and quickest way to create roll paper printouts with this printer.
 See Printing Photos the Easy Way See Printing Photos the Easy Way
When you are printing a borderless image on roll paper and Banner Mode is selected in the Roll Paper Options window (Windows) or Banner is selected as the Roll Paper Option setting in the Page Setup dialog box (Mac OS X), you need to use your image-editing application to make the image 5 mm wider than the roll paper.
If your application has margin settings, make sure they are set to zero before printing. |
Loading roll paper
Refer to the section below for loading roll paper.
Printer settings for Windows
Follow these steps to adjust your printer settings.
 |
Open the file you want to print.
|
 |
Access the printer settings.
|

 |
Click the Main tab, then select one of the following Quality Options:
|
Text & Image for higher quality documents with text and images
Photo for photos and graphics with good quality and speed
Best Photo for photos and graphics with high print quality
 |
Select Roll as the Source setting.
|
 Note:
Note:|
Do not select Sheet as the Source setting when roll paper is loaded; this causes unnecessary paper to feed after each document.
|
 |
Click the Settings button. Then, select the appropriate Options settings in the Roll Paper Options window.
|

Select Cut Sheet Mode to print standard-sized photos. Select Banner Mode to print banners.
 |
Click OK to return to the Main window.
|

 |
Select the appropriate Type setting.
|
 |
Select the appropriate Size setting.
|
 |
Select Borderless if you want to print borderless photos.
|
 |
Select Portrait (tall) or Landscape (wide) to change the orientation of your printout.
|
 |
Click OK to close the printer settings window.
|
 |
Print your file.
|
 |
Cut the roll paper.
|
 Note:
Note:|
Wait until the printer stops printing and feeding paper. Cut off the paper at the back of the printer and then turn it off. The remaining paper is ejected.
|
Printer settings for Mac OS X
Follow these steps to adjust your printer settings.
 |
Open the file you want to print.
|
 |
Access the Page Setup dialog box.
|

 |
Select the printer you are using as the Format for setting.
|
 |
Select the appropriate Paper Size setting.
 Note: Note:
|
 |
Select the appropriate Orientation setting.
|
 |
Click OK to close the Page Setup dialog box.
|
 |
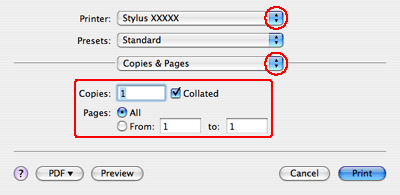
Access the Print dialog box.
|

 |
Select the printer you are using as the Printer setting. Then make the Copies & Pages settings.
|
 |
Select Print Settings from the pop-up menu.
|

 |
Select the appropriate Media Type, Color, and Mode settings. See online help for details on Print Settings.
|
 |
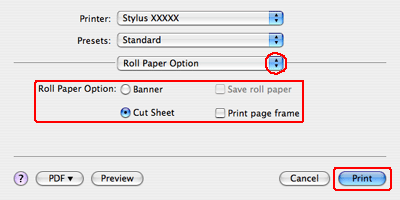
Select Roll Paper Option from the pop-up menu.
|

 |
Select Cut Sheet to print standard-sized photos. Select Banner to print banners.
|
 |
Click Print to start printing.
|
 |
Cut the roll paper.
|
 Note:
Note:|
Wait until the printer stops printing and feeding paper. Cut off the paper at the back of the printer and then turn it off. The remaining paper is ejected.
|
