
How To / Printing on CD-R
Insert the CD-R into the printer as follows. The following describes how to set the 12 cm CD-R as an example.
 | Caution: |
|
|
 | Note: |
| Before printing to the CD-R, it is necessary to clean the roller inside of the printer by feeding and ejecting A4 size normal paper. Refer to Cleaning the Printer and clean the inside of the printer. |
 | Make sure that the printer is on. |
 | Warning: |
| Make sure to insert the CD-R tray while the power is on. If the power is off, automatic print position adjustment may not be done after inserting the CD-R tray. |
 | Push back the tray extension. |
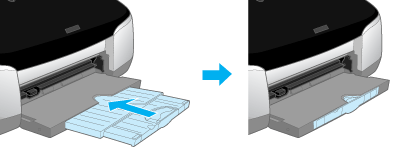
 |
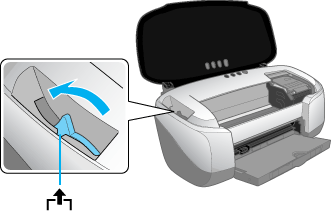
Open the printer cover, then set the adjust lever to the  position. position.  paper light flashes quickly. paper light flashes quickly.
|
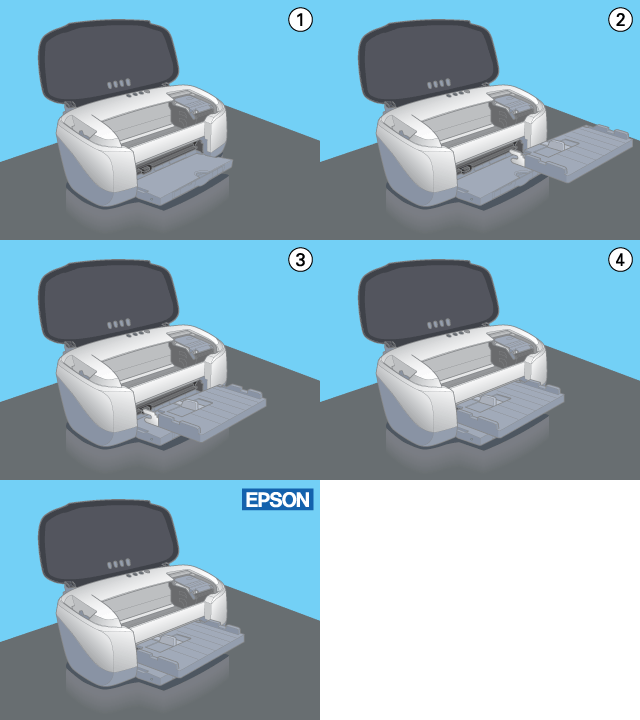
 | Set the front sheet feeder to the printer. |
 | Note: |
| Attach the front sheet feeder firmly to the right position of the printer. |
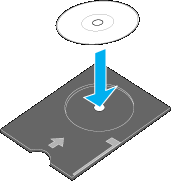
 | Place the CD-R on the CD-R tray with the label surface up. |
 | Note: |
| Place one CD-R at a time. |
|
12 cm CD-R |
8 cm CD-R Fix the 8 cm CD-R support provided with the printer to the outside of CD-R. |
 |
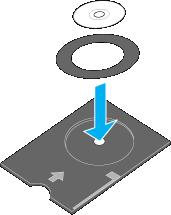 |
 | Caution: |
|
|
|
 | Slide the left edge guide to the position wider than the width of the CD-R tray. |
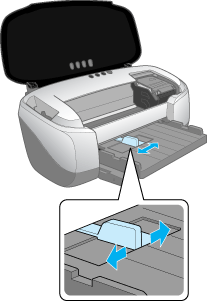
 | With the CD-R loaded printable side up, insert the CD-R tray straight and horizontally along the right edge of the front sheet feeder. Apply light pressure with the hand to prevent the tray slipping from the front sheet feeder and insert the tray until the half circle shaped hollow back of the front sheet feeder and the hollow of the CD-R tray join. |
 | Note: |
| If the CD-R tray slips from the front sheet feeder, the printable surface may be damaged when the tray is inserted. Take great care with this step. |
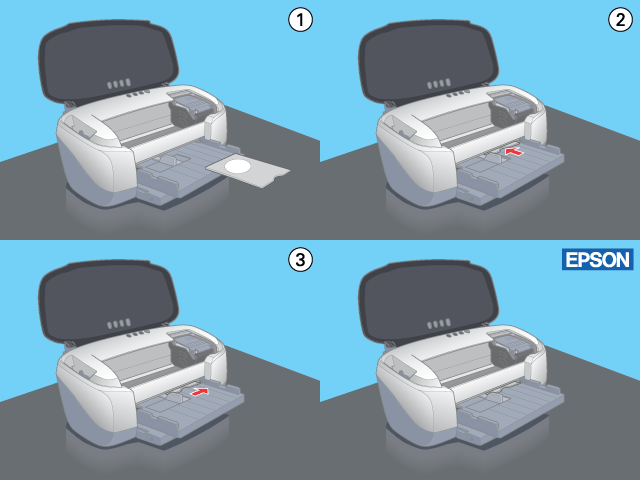 |
||
 |
||
 |
||
|
 | Slide the left edge guide against the edge of the CD-R tray. |
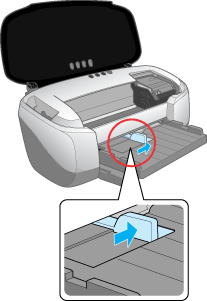
 |
Set the adjust lever to the  position. position.  paper light is turned off. paper light is turned off.
|
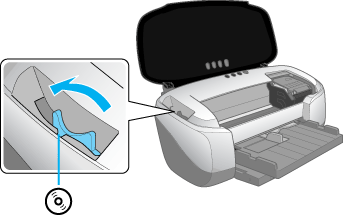
 | Caution: |
Make sure to switch the adjust lever to the  position. If you print in the position. If you print in the  position or the position or the  position, it may cause damage to the hardware. In addition, if the lever is set to the position, it may cause damage to the hardware. In addition, if the lever is set to the  position, the printer will not start printing. position, the printer will not start printing.
|
 |
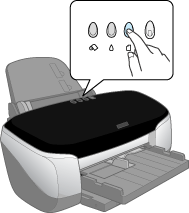
Close the printer cover, then press the  paper button. The CD-R tray is adjusted to the proper position automatically. paper button. The CD-R tray is adjusted to the proper position automatically.
|
 | Note: |
|
|
 Previous |
 Next |