How To / Using Automatic Roll Paper Cutter
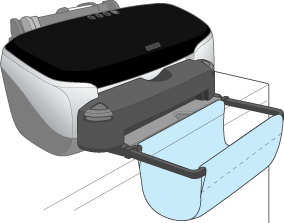
To receive the paper cut off by the cutter, attach the photo catcher. Follow the steps below.
 | Caution: |
| When using the photo catcher, move the printer to the edge of the desk or table so that the cloth of the photo catcher hangs as shown in the illustration. Be careful not to let the printer fall from the desk or table when moving it. In addition, do not place the printer on an unstable surface. |

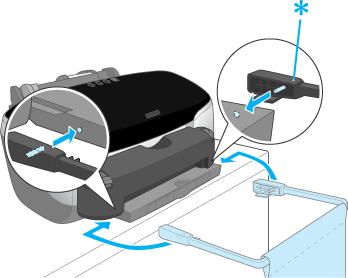
 | Attach the arm part of the photo catcher to the output tray. |
 |
||
|
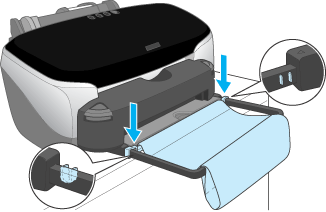
 | Fix the shaft part of the photo catcher by putting it into the groove of the arm. |

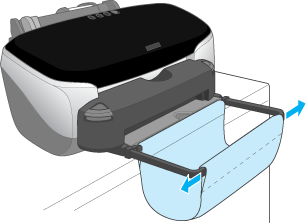
 | Put the cloth inside of the arm and make it like a bag, then remove any slack by pulling the edges of the cloth to left and right. |

 | Caution: |
| The following specifies the size and amount of the roll paper the photo catcher can hold. |
|
|
| In addition, remove the photo catcher in case the length exceeds 297 mm. If you use paper in excess of this range, a paper jam may occur or the photo catcher may be damaged. |
 Previous |
 Next |