
How To / Paper Handling
Follow the instructions below to print on matte board. You can use matte board with a thickness between 0.4 mm and 1.3 mm.
 | Caution: |
|
|
 | Turn on the printer. |
 | Note: |
|
|
 |
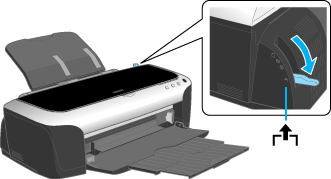
Set the adjust lever to the  position. The position. The  paper light starts flashing. paper light starts flashing.
|
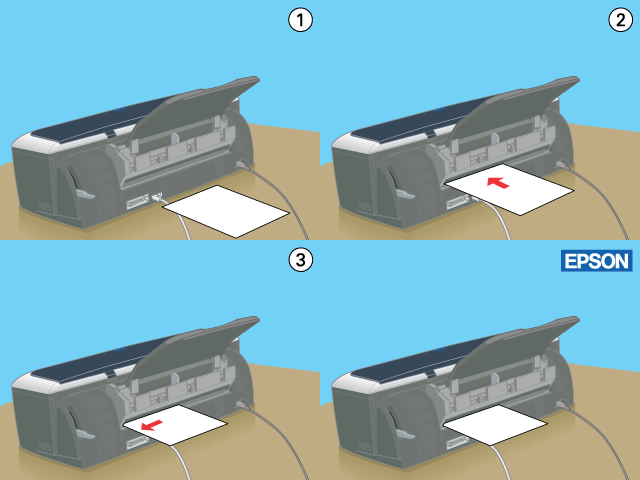
 | Insert the matte board with the printable side up. Touch the matte board to the left side of the matte board feeder and insert it horizontally. Load one sheet at a time. |
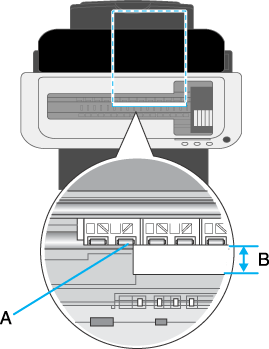
 | Open the printer cover and adjust the end of the matte board so that it is 1 cm from the roller. |
 |
||||
 |
||||
 |
||||
|
 | Note: |
|
|
 |
Move the adjust lever to the  position. position.
|
 | Note: |
| Do not move the adjust lever during printing as this may damage the printer. |
 |
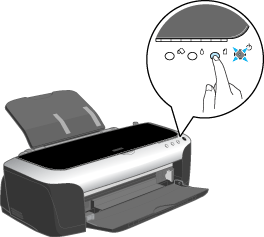
Close the printer cover, then press the  paper button. The matte board will automatically feed into the printer. paper button. The matte board will automatically feed into the printer.
|
 | Note: |
The  paper light starts flashing if the adjust lever is set inappropriately. Set the adjust lever to the correct position and press the paper light starts flashing if the adjust lever is set inappropriately. Set the adjust lever to the correct position and press the  paper button. paper button.
|
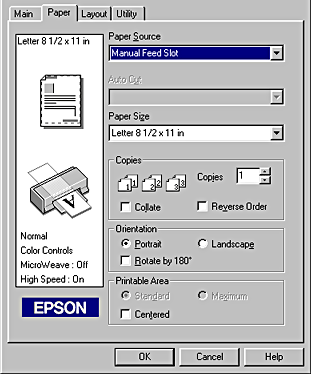
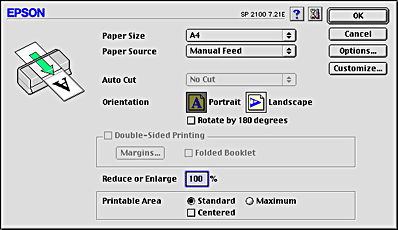
 | Make sure Manual Feed Slot is selected as the Paper Source setting in the printer driver. |
 | Note: |
|
|
 Previous |
 Next |