Printing with Windows
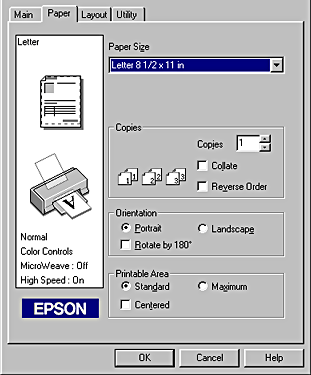
Use the settings on the Paper menu to change the paper size, set the number of copies and other copy parameters, specify the paper orientation, and adjust the printable area.
You can make the following settings on the Paper menu:
|
Paper Size |
Select the paper size that you want to use. You can also add a custom paper size. |
|
Copies |
Select the number of copies that you want to print. You can select Collate to print one set at a time or Reverse Order to print your documents in reverse order, starting with the last page. |
|
Orientation |
Select Portrait (tall) or Landscape (wide) to change the orientation of your printout. To print closer to the bottom of the page, select the Rotate by 180° check box. |
|
Printable Area |
Use the options in the Printable Area box to adjust the total area available for printing. To center the printout, select Centered. To increase the printable area, select Maximum. |
 | Note: |
|
|
|
 Previous |
 Next |