 |
 |
|
||
 |
||||
Setting Up the Auto Duplexer
 Note:
Note:|
The illustrations in this section may vary depending on the product.
|
Attaching the Auto Duplexer
 |
Turn off the printer.
|
 |
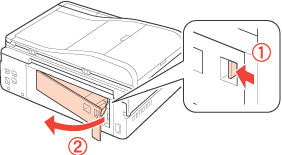
Remove the rear cover by squeezing the hook on the right side.
|

 Note:
Note:|
Your printer may not have a rear cover depending on the location of purchase.
|
 |
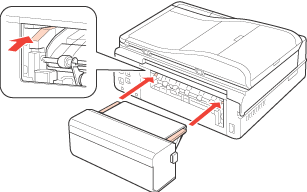
Insert the both sides of the connector of the Auto Duplexer along the slits of the printer.
|

 |
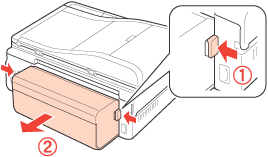
Holding the buttons on the sides, horizontally insert the Auto Duplexer into place.
|

Removing the Auto Duplexer
 |
Turn off the printer.
|
 Note:
Note:|
If you are removing the Auto Duplexer to remove jammed paper, do not turn off the printer.
|
 |
Remove the Auto Duplexer by pressing the buttons on the sides.
|

 |
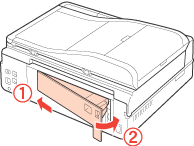
Attach the rear cover that you removed when you attached the Auto Duplexer.
|

 Note:
Note:|
Your printer may not have a rear cover depending on the location of purchase.
|
