 |
|
|||
 |
||||
The Paper Jams
 Note:
Note:|
The illustrations in this section show the PX800FW/TX800FW Series.
|
Removing jammed paper from inside the printer
 |
Cancel the print job if necessary.
|
 |
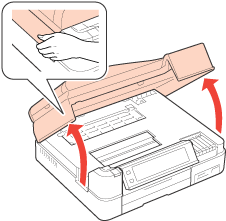
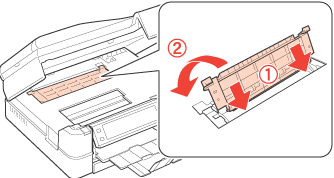
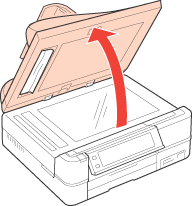
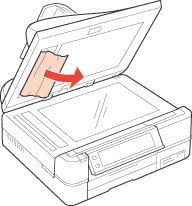
Raise the scanner unit.
|
 |
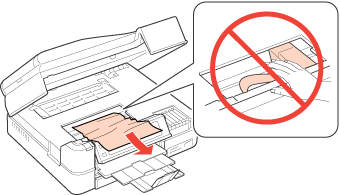
Remove all of the paper from the opening, including any torn pieces.
|
 |
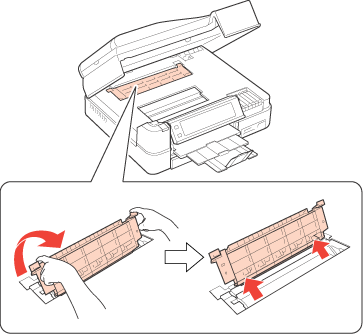
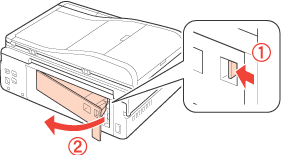
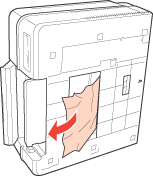
Squeeze the hooks on the cover at the back and remove the cover.
|
 |
Remove all of the paper inside, including any torn pieces.
|
 |
Reattach the cover.
|
 |
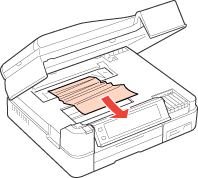
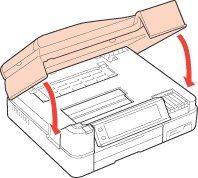
Close the scanner unit. If the jammed paper remains near the output tray, carefully remove the paper.
|
 |
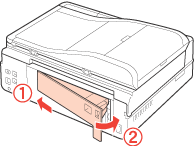
Remove the rear cover by squeezing the hook on the right side.
|
 |
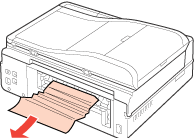
Carefully remove the jammed paper.
|
 |
Reattach the rear cover.
|
 Note:
Note:|
If the printer's LCD screen tells you to turn off the printer, press the
 On button to turn off the printer. Raise the scanner unit, and remove the jammed paper as shown below. On button to turn off the printer. Raise the scanner unit, and remove the jammed paper as shown below. 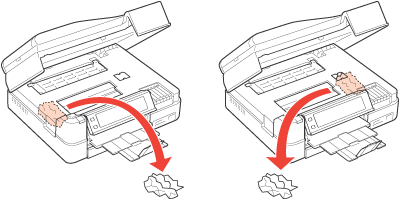 |

Removing jammed paper from the paper cassette
|
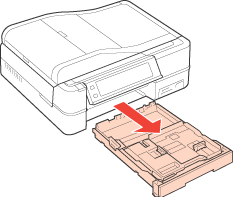
Close the output tray.
|
|
Pull out the paper cassette.
|
|
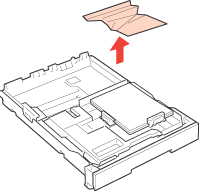
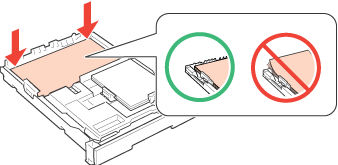
Remove the jammed paper from the cassette.
|
|
Align the edges of the paper.
|
|
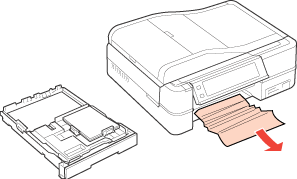
Carefully remove any paper jammed inside the printer.
|
|
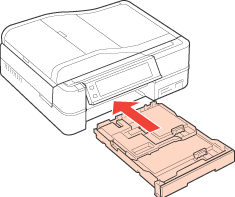
Keep the cassette flat as you insert it back into the printer.
|
|
If the error message still does not clear, try the following steps.
|
|
Turn off the printer and unplug the power cord from the printer and the electrical outlet.
|
|
Close the output tray if it is extended.
|
|
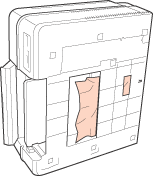
Remove the paper cassette, and carefully stand the printer on its left side.
|
 |
Carefully remove the jammed paper.
|
 |
Replace the printer and the paper cassette.
|
 |
Plug the power cord into the printer and the electrical outlet.
|
Removing jammed paper from the automatic document feeder (ADF) - PX800FW/TX800FW Series -
|
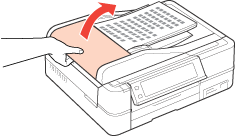
Open the ADF cover.
|
 Caution:
|
Make sure you open the ADF cover before removing jammed paper. If you do not open the cover, the printer may be damaged.
|
|
Carefully remove the jammed paper.
|
|
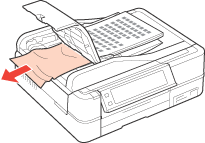
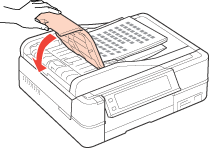
Open the Document cover.
|
|
Carefully remove the jammed paper.
|
|
Close the ADF cover.
|
Removing jammed paper from the optional Auto Duplexer
|
Make sure the printer is turned on.
|
|
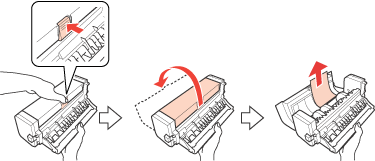
Remove the Auto Duplexer.
|
Note:|
Do not turn off the printer when removing jammed paper from the Auto Duplexer.
|
|
If you can see the paper jammed in the printer, pull it out slowly.
|
|
If you can see the paper jammed in the Auto Duplexer, open the unit and pull the jammed paper out slowly.
|
|
Reattach the Auto Duplexer.
|
Preventing paper jams
If your paper jams frequently, make sure the following.
The paper is smooth, not curled or wrinkled.
You are using high quality paper.
The printable side of the paper is face down in the paper cassette.
The paper stack was fanned before loading.
The paper is not loaded above the edge guides inside the paper cassette.
The number of sheets in the paper stack does not exceed the limit specified for that paper.
 See Selecting which tray to use and its loading capacities.
See Selecting which tray to use and its loading capacities.