Replacing an Ink Cartridge Before It Is Empty
 Using the Buttons Using the Buttons
 Using Your Computer (for Windows) Using Your Computer (for Windows)
You may need to replace an ink cartridge before it is empty if it has been installed in your printer for more than six months and print quality declines.
To replace an ink cartridge before the  ink light flashes or EPSON Status Monitor notifies you that the cartridge is empty, follow the instructions in this section. ink light flashes or EPSON Status Monitor notifies you that the cartridge is empty, follow the instructions in this section.
You can replace an ink cartridge using the printer buttons or using your computer.
 |
Caution: |
 |
|
Do not remove the cartridge from the printer until you are ready to replace it with another.
|
|
 |
Note: |
 |
|
The illustrations show replacement of the cyan ink cartridge, but the instructions are the same for all cartridges.
|
|
 |
Make sure that the printer is on. The On light should be on, but not flashing.
|
 |
Make sure that the document cover is closed, and then open the scanner unit.
|
 |  |
Caution: |
 |  |
|
Do not open the scanner unit when the document cover is still open.
|
|
 |
Press the  Ink button. Ink button.
The print head moves to the ink cartridge replacement position.
|
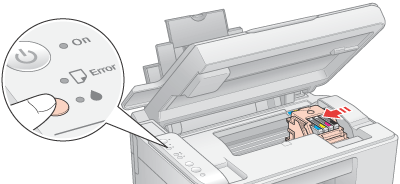
 |  |
Note: |
 |  |
Caution: |
 |
For best results, shake the ink cartridge four or five times before opening the package.
|
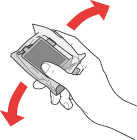
 |
Remove the new ink cartridge from the package.
|
 |  |
Caution: |
 |
Open the cartridge cover.
|
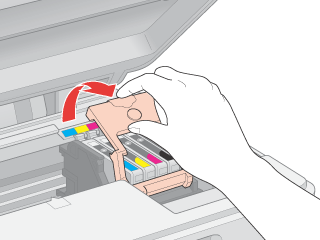
Squeeze the tab at the back of the ink cartridge that you want to replace. Lift the cartridge out of the printer and dispose of it properly. Do not take the used cartridge apart or try to refill it.
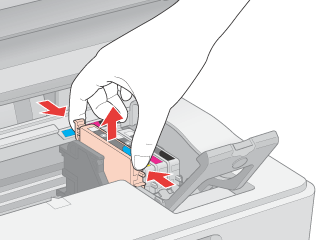
 |
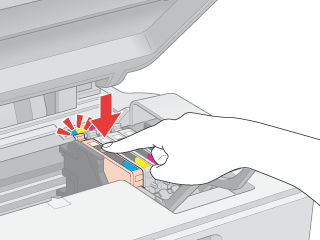
Place the ink cartridge into the cartridge holder. Then push down the ink cartridge until it clicks into place.
|
 |
When you have finished replacing the ink cartridge, close the cartridge cover and press it so that it clicks into place. then close scanner unit.
|
 |
Press the  Ink button. Ink button.
|
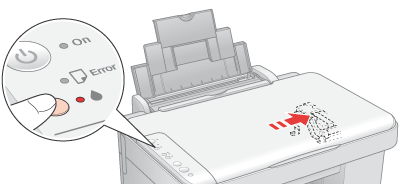
The printer moves the print head and begins charging the ink delivery system. This process takes about one minute to complete. When ink charging is finished, the print head returns to its home position. The On light stop flashing and remains on, and the  ink light goes out. ink light goes out.
 |  |
Caution: |
 |  |
|
The On light continues to flash while this printer is charging ink. Never turn off this printer while this light is flashing. Doing so can result in incomplete charging of ink.
|
|
 |  |
Note: |
Using Your Computer (for Windows)
You can view on-screen instructions for replacing an ink cartridge using the printer maintenance utilities.
If you need to replace an ink cartridge before it is low or empty, click the button on the Maintenance tab.
For more information on using the printer utilities, see the online help.
| 


 Using the Buttons
 ink light flashes or EPSON Status Monitor notifies you that the cartridge is empty, follow the instructions in this section.


 Do not touch this part.


 Top
Top