 |
 |
|
||
 |
||||
Scanning Multiple Documents to a PDF File
First of all, place your document and start Epson Scan.

 |
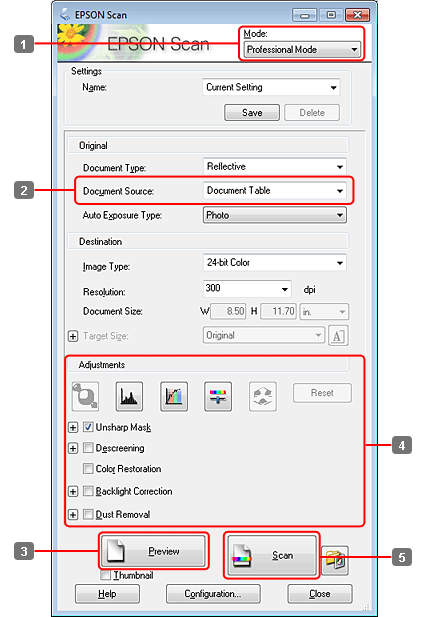
Select Professional Mode from the Mode list.
|
 |
Select the Document Source setting.
|
 |
Click Preview.
|
 Note for the Automatic Document Feeder (ADF):
|
The document page ejected by the ADF has not been scanned yet. Reload the entire document into the ADF.
 Do not load paper above the
 arrow mark on the ADF. arrow mark on the ADF. |
 |
Adjust the exposure, brightness, and other image quality settings.
|
See the Help for more details on Epson Scan.
 |
Click Scan.
|

 |
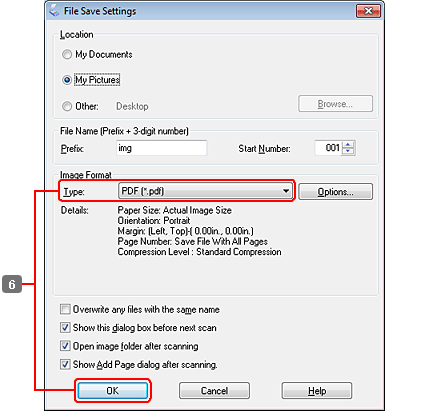
Select PDF as the Type setting, and then click OK.
|
 Note:
Note:|
If the Show Add Page dialog after scanning check box is cleared, Epson Scan automatically saves your document without displaying the Add Page Confirmation window.
|
 |
Epson Scan starts scanning your document.
|

 |
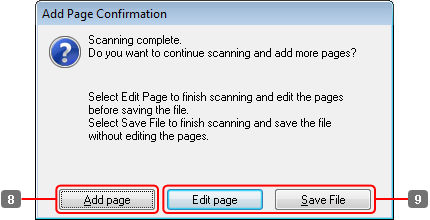
If you want to scan more pages, click Add page.
Load the document and scan again, repeating as necessary for each page. |
If you have finished scanning, go to step 9.
 |
Click Edit page or Save File.
|
|
Edit page
|
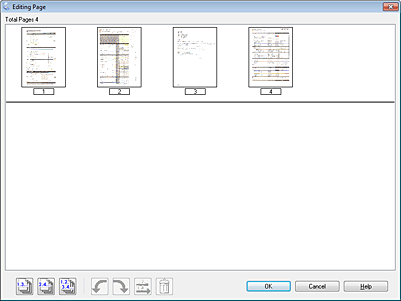
Select this button if you want to delete or reorder any of the pages. Then use the icons on the bottom of the Editing Page window to select, rotate, reorder, and delete pages.
See the Help for more details on Epson Scan.  Click OK when you are finished editing your pages.
|
|
Save File
|
Select this button when you are finished.
|
The pages are saved in one PDF file.
