 |
|
|||
 |
||||
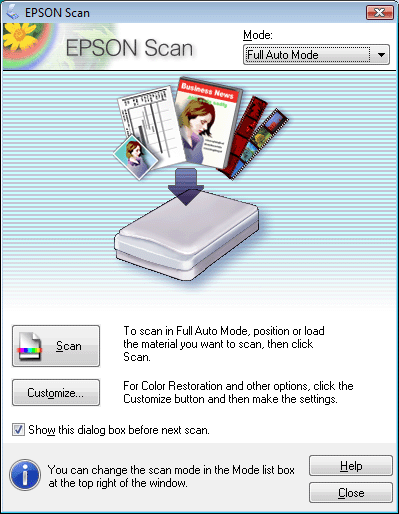
Scanning in Full Auto Mode
For Photo PX700W/Photo TX700W
When you start Epson Scan for the first time, it runs in Full Auto Mode and displays the Epson Scan Full Auto Mode window.
 |
Place your original(s) on the document table. See the booklet for instructions.
|
 |
Start Epson Scan. See Starting Epson Scan for instructions.
|
 |
Select Full Auto Mode from the Mode list. See Changing the Scan Mode for instructions.
|
 |
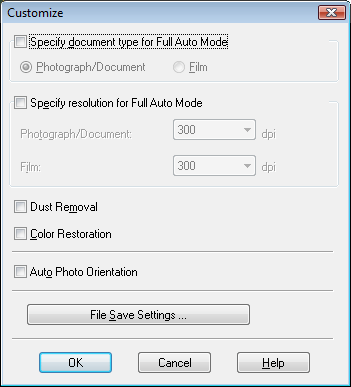
If you want to select a custom resolution, restore faded colors, or remove dust marks, click Customize. You see the Customize window.
|
 Note:
Note:|
If you started scanning from a TWAIN-compliant program like Adobe Photoshop Elements, the File Save Settings button does not appear.
|
 |
Select your settings and click OK. For details on selecting the settings in the Customize window, see Epson Scan Help.
|
 |
Click Scan. Epson Scan starts scanning in Full Auto Mode.
|
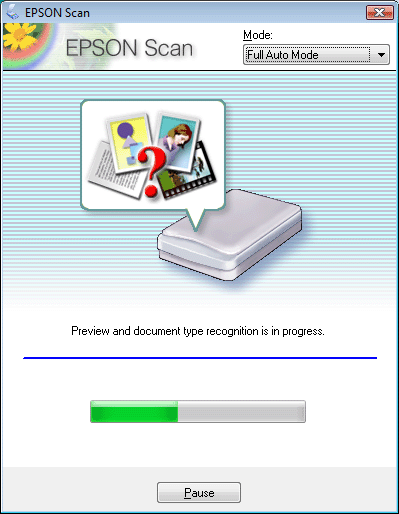
Epson Scan previews each image, detects which type of original it is, and selects the scan settings automatically. After a moment, you see a small preview of each image in the Epson Scan window.
Note:|
If you need to change any settings, click Pause. You will return to the Epson Scan Full Auto Mode window.
If you need to cancel scanning, click Cancel when it appears.
|
What happens next depends on how you started your scan. See Finishing the Scan for instructions.