Replacing an Empty Ink Cartridge
 Using the Buttons Using the Buttons
Using Your Computer
You can replace an ink cartridge using the printer buttons or using your computer. Refer to the appropriate section below for instructions.
This table describes the status of the lights and the actions you need to take.
|
Lights
|
Action
|
|

|
Obtain a replacement ink cartridge.
|
|

|
Replace the empty ink cartridge.
|
To replace an ink cartridge using the  ink button, follow the steps below. ink button, follow the steps below.
 |
Note: |
 |
|
The illustrations show replacement of the black ink cartridge, but the instructions are the same for all the cartridges.
|
|
 |
Make sure the  power light is on, but not flashing. power light is on, but not flashing.
|
 |
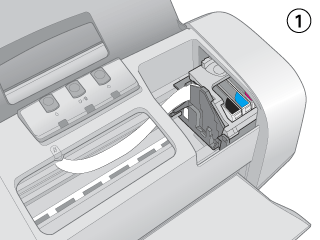
Lower the output tray, and then open the printer cover.
|
| |
Note: |
|  |
Caution: |
 |
Press the ink button again.
|
If more than one ink cartridge is empty or low, the print head moves to the  mark. This occurs each time you press the ink button until all empty or low ink cartridges have been indicated. mark. This occurs each time you press the ink button until all empty or low ink cartridges have been indicated.
Once all of the empty or low ink cartridges have been indicated, the print head moves to the ink cartridge replacement position when you press the ink button.
 |
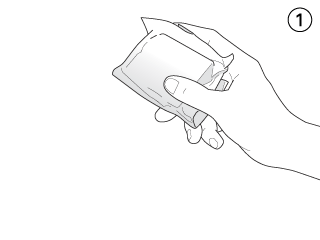
For best results, shake the ink cartridge four or five times before opening the package.
|
 |
Remove the new ink cartridge from the package.
|
| |
Caution: |
 |
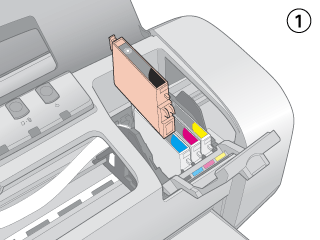
Open the cartridge cover. Squeeze the tab at the back of the ink cartridge that you want to replace. Lift the cartridge out of the printer and dispose of it properly. Do not take the used cartridge apart or try to refill it.
|
 |
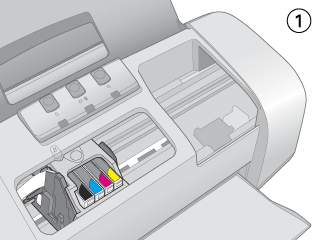
Place the ink cartridge into the cartridge holder. Then push down the ink cartridge until it clicks into place.
|
 |
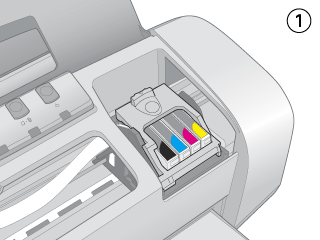
When you are finished replacing cartridges, close the cartridge cover and the printer cover.
|
 |
Press the ink button.
|
The printer moves the print head and begins charging the ink delivery system. This process takes about one minute to complete. When ink charging is finished, the print head returns to its home position. The power light stop flashing and remains on, and the ink out light goes out.

| |
Caution: |
| |
Note: |
You can monitor the remaining ink levels from your computer and view on-screen instructions for replacing a low or empty ink cartridge.
When an ink cartridge is low or empty, click How to in the EPSON Status Monitor window. Follow the on-screen instructions to replace the cartridge.
For more information on using your computer to replace ink cartridges, see the section below.
 See Using EPSON Status Monitor 3 (Windows) See Using EPSON Status Monitor 3 (Windows)
See Using EPSON StatusMonitor (Mac OS X)
| 


 Do not touch this part.
 Top
Top