 |
|
|||
 |
||||
Refilling the Ink Tanks
You can refill an ink tank when the ink alert message appears on your computer screen and the ink level is below the lower line on the ink tank.
You can monitor the approximate ink levels from your computer and view on-screen instructions for refilling ink.
When you need to refill ink, click How to in the status monitor window. Follow the on-screen instructions to refill ink.
For more information on using your computer to refill ink, see the section below.
 See Using EPSON Status Monitor 3 (Windows)
See Using EPSON Status Monitor 3 (Windows) Note:
Note:|
The illustrations show how to refill the black ink. However, the instructions are the same for all of the inks.
|
 |
Make sure the
 power light is on, but not flashing. power light is on, but not flashing. |
 |
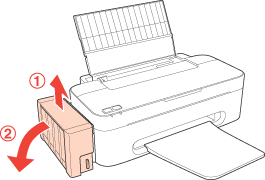
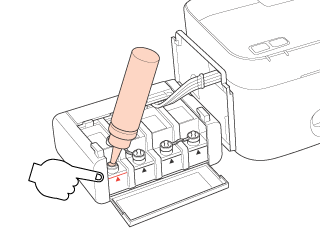
Unhook the ink tank unit from the printer and lay it down.
|
 Note:
Note:|
Do not pull the tubes.
|
 |
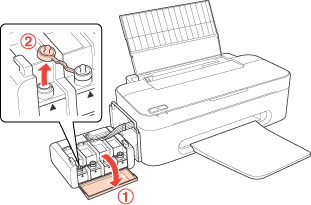
Open the ink tank unit cover, and then remove the cap of the ink tank.
|
 Note:
Note:|
Be careful not to spill any ink.
Make sure that the color of the ink tank matches the ink color that you want to refill.
|
 |
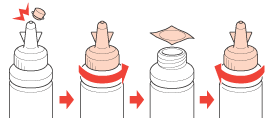
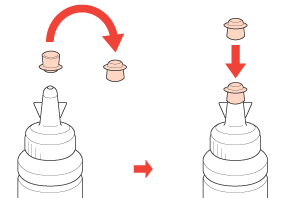
Snap off the top of the cap, remove the cap of the ink bottle, remove the seal from the bottle, and then install the cap.
|
 Note:
Note:|
Do not dispose of the top of the cap. If any ink remains in the ink bottle after refilling the tank, use the top of the cap to seal the ink bottle cap.
|
 |
Refill the ink tank with the correct colored ink up to the upper line on the ink tank.
|
 Note:
Note:|
If any ink remains in the ink bottle after filling the ink tank up to the upper line, install the cap securely and store the ink bottle upright for later use.
|
 |
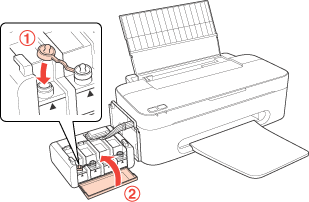
Install the cap onto the ink tank securely and then close the ink tank unit cover.
|
 |
Hook the ink tank unit onto the printer.
|
 |
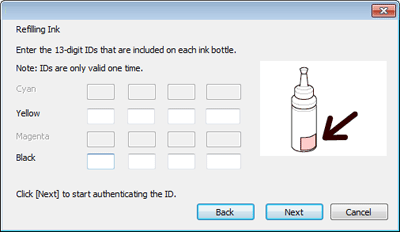
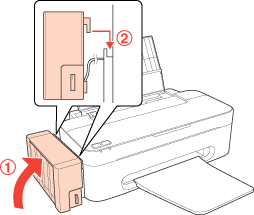
Confirm the ID that is indicated on the ink bottle, and then follow the on-screen instructions to enter the ID and complete the refilling procedure.
|